2/29/12

Experimenting with Monochromatic Cards

Every month, there is a different color challenge for the Fiskateers.  During February, we were asked to create something inspired by a box of chocolates.  My mind immediately went to See's.  My absolute favorites are their raspberry truffles, lemon truffles, mint truffles, dark chocolate chip truffles, maple walnut, and dark Bordeaux.  Yum.  

I knew I'd be making a card for the challenge.  But which particular chocolate to use as my inspiration?  Rather than introduce the pinkish red of raspberry or the pale yellow of the lemon, I decided to challenge myself and keep my color palette monochromatic.  I further challenged myself to use only scraps.  I dug through my "neutrals" container and found two beautiful browns.  Together they reminded me of chocolate covered caramels.  So that became my official inspiration chocolate.  See's makes an excellent chocolate covered caramel.

This is what I made:

Obviously, the colors echo those of the caramel, but so does the rectangular shape.  The scalloped accent behind the sentiment was inspired by the little swirls See's puts on the tops of the candies.

After I made my card, I still had a pile of scraps left over.  I was curious to see what would happen if I reversed all the colors.  I made exactly the same card, but it looks completely different.


Neither scan turned out all that well, but you get the idea.  (Steve thinks it's time for a new scanner bulb, as colors don't scan true anymore.  I correct scans in Picasa until they look close to the original.)  It is fascinating how simply reversing the colors creates such a different look.  I greatly prefer the first.

2/28/12

Orange Sherbet

Orange bread, orange sorbet... what else could I make with the many oranges from our tree? How about orange sherbet?!

I checked the recipe booklet that came with our ice cream maker. There was an orange sherbet recipe, but it called for melted orange juice concentrate instead of fresh juice. I turned to Google to read through some recipes. I'd planned to get a general idea of what goes into a sherbet then invent my own, but that was before I found Alton Brown's recipe for orange sherbet. We're big AB fans and I knew his recipe would be great.

I mixed up a batch and added it to the ice cream maker. Here are Steve and Trevor, checking on the progress of the sherbet:


And here is the finished sherbet. I realize that this photo looks like scrambled eggs, not sherbet, but you'll have to trust me. It was dark when I took the picture and my sherbet was melting rapidly, so I didn't take the time to take a proper picture.  


I decided to put the leftover sherbet into popsicle molds, which we enjoyed after dinner the following day. (Trevor was sick and stayed in jammies all day. This photo cracks me up, because it looks like the dinosaur is trying to eat the popsicle before Trevor does.)


Alton Brown's Orange Sherbet


                                   7 ounces sugar                                          1 tablespoon lemon juice
                                   1 1/2 tablespoons orange zest                   1 teaspoon vanilla extract
                                   1/4 teaspoon kosher salt                           1 1/2 cups very cold whole milk
                                   2 cups orange juice

In the bowl of a food processor combine all of the ingredients except the milk and process until the sugar is dissolved, approximately 1 minute. (I didn't use a food processor. I just stirred the ingredients in a bowl and the sugar dissolved just fine.) Transfer the mixture to a mixing bowl and whisk in the milk. Cover the bowl and place in the refrigerator until the mixture reaches 40°F or below, approximately 1 hour.

Pour the mixture into an ice cream maker and process until it is the consistency of soft serve ice cream. You may serve now or transfer to a lidded container and place in freezer until firm, approximately 3 hours.


2/27/12

Marble Painting

I love marble painting.  What's not to love?  It's fun, easy, and inexpensive.  And for a painting project, it is surprisingly easy to clean up afterwards.

You'll need: marbles, washable paints (I like Crayola), paint cups (mine were once applesauce containers), white paper, low-stick tape, and an empty shoebox.


Put some paint into each paint cup.  If the paint is thick, dilute it with some water.  You'll want the paint to be a bit runny.  Drop a marble in each cup.


Make loops of low-stick tape, then attach a piece of paper to the bottom of the shoebox.  Pick up a marble and drop it in the shoebox.  Pick up the box and wiggle it to make the marble roll around.  When there is no more paint left on the marble, put it back in the paint cup.  Continue with different colors until you are happy with the design.


Here is Trevor's finished paper.


Steve walked by while Trevor was creating.  It's very rare that Steve joins us for crafts, but he asked if he could give this a try.  Fun for the whole family!


Of course, you don't have to drop the marbles in one at a time.  You can put them all in at once if you want.


The finished marble art is beautiful on its own, but you can also use it anywhere you'd use patterned paper.  I trimmed my art and used it to make a quick, one-of-a-kind card.


I mentioned the easy cleanup- simply rinse off the marbles and they're good as new.  Recycle the box, or save it for the next painting project.  Rinse the paint cups, or simply let the paint cups dry as is.  You can use the dried paint for a future watercolor project- simply rub with a wet brush.  Works like a charm!

2/24/12

Ask Cindy - 'Finding' Time to Craft

It's time for another edition of 'Ask Cindy' - the feature where I answer questions you, the reader, may or may not have actually asked.  Today's question is one that I hear all the time: "I don't have time to craft.  How do you find the time?"

To be perfectly honest, this question drives me crazy.  As a stay-at-home mom, I'm already a bit sensitive about the "what do you do all day?" attitude that some people (but not you, of course) have.  And as a mom to one, I'm also a bit sensitive about the idea that some people (again, not you) have that raising one child is basically the same as raising no children.  When someone asks me how I find the time to craft, I want to ask how they find the time to watch TV, go shopping, or play games on Facebook .... because the answer is the same: I make the time.  I make time to do what is important to me and you make time to do what is important to you.  Crafting is important to me.  So I make the time.


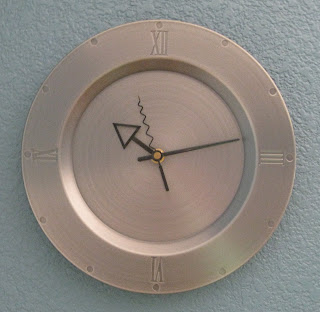
 The clock in my scraproom.  I bought it years ago, when I was single.  
I love it, especially the wiggly second hand.


One example of how I make time to craft: I get up at 5:00 AM, seven days a week.  Trevor usually wakes up around 6:30, so that gives me around 90 minutes of uninterrupted time.

On weekdays, Trevor is in kindergarten for a little over 3 hours a day.  On the days when I'm not volunteering in his classroom, this is another prime scrapbooking or blogging time for me.  I also use this time block to photograph projects (since it's dark at 5:00 AM) or scan projects (since my scanner is just outside Trevor's bedroom and it would wake him if I scanned at 5:00 AM).

My dad and I belonged to a YMCA Father/Daughter group when I was young.  At one of our meetings, he provided clock kits for the dads and daughters to make together.  I was 12.  It's one of the few things I own that has traveled with me from my parents' house to every other place I have lived for the past few decades.


Once Trevor is home from school for the day (or during school vacations), any crafting that I do is with him.  (You'll notice that I do almost no scrapbooking during the summer, and the number of kids' crafts I do goes way up.)  Sometimes I plan a project for us to do together, and sometimes I just get out art supplies for free-for-all creating.  (And sometimes, Trevor plans a craft for me.)  Sometimes we cook together instead.  We don't craft together every single day, but I do try to make sure that he uses his creativity in some way each day.

There is one more major factor in how I make time to craft- my husband.  Steve is incredibly supportive of my crafting.  He encourages me to scrap with friends, do online crops, and attend scrapbook events, even though that means extra work for him.  When I have a deadline, he takes over all of the parenting duties to allow me some extra evening or weekend time to myself.  He recognizes that celebrating National Scrapbook Day is incredibly important to me, and always takes Trevor out of the house for the day so that I can have a marathon day of crafting.

The clock in our Bonus Room.  I bought it for Steve when we were newly dating.  While I think they 
are beautiful, I hate fish.  Never in a million years would I have guessed I'd marry a man who loves fish so 
much that our house would have fish decor.  Yet it's my own doing- 90% is stuff I've made or bought for him.  


How do you make time to craft?

2/23/12

Cards as Gifts

Many people struggle with gift ideas for the older generation.  Grandparents, parents, and aunts/uncles often don't want anything, don't need anything, and buy what they want when they want it.  My usual solution for this is to give something handmade and/or consumable. 

Each year I make a stack of blank cards to give to my mom for her birthday, Mother's Day and Christmas.  She is not a cardmaker but appreciates being able to send handmade cards.  She lets me know if there are any specific types that are running low.  This time she requested female birthday cards, thinking of you cards, and get well cards.  Thank goodness she doesn't want sympathy cards.  I really struggle making them.

Get well cards are almost as difficult.  Sometimes cutesy and whimsical is fun, but depending on the injury or illness, they can be totally inappropriate.  I decided to make some very neutral get well cards that my mom can send.

Simple and to the point.

Here's a "Thinking of You" card, following the same basic design I scraplifted from myself a few weeks ago. 


I think this is going to be my new go-to card design...

2/22/12

Lemon and Orange Sorbets

You know what is REALLY good on a cold winter's day? Lemon sorbet. OK, it's good no matter what the season or temperature. My parents have a lemon tree, so we're blessed with tons of free lemons. I use them fresh, of course. I also freeze the juice and the zest so that I can have a supply year-round.

You know what else is REALLY good? Orange sorbet. Our orange tree is out of control this year, so I'm juicing and zesting oranges frequently too. 


You know what is REALLY hard to photograph on a dark winter's evening? Sorbet. Any flavor. 
(Lemon on the left; orange on the right.)

I love how easy it is to whip up a quick sorbet with the ice cream machine. I also love that I can control the amount of sugar I add.

To make lemon sorbet, I combine two cups of simple syrup (equal parts water and sugar, boiled, then cooled) with 1 1/2 c. lemon juice and 2 T lemon zest. To make orange sorbet, I combine one cup of simple syrup with 2 1/2 cups of orange juice and 2 T. orange zest. After about 20 minutes in the ice cream maker, it's ready to eat. Delicious!


2/21/12

Secret Agent #004113

When Lead Fiskateer Rebecca asked who would be willing to complete a secret mission and earn "double 0" status, I couldn't volunteer fast enough!  She mailed me two Jenni Bowlin Limited Edition punches: the Jester border punch and Jenni's Butterfly punch.  I was instructed to create whatever I wanted, but to keep it all top-secret.

I started with the Jenni's Butterfly punch.  I decided to make a "thanks for all you do" card.  I wanted the butterflies to pop off the card as if they were flying.  I used chalk to create a sky background (which I described here), added some clouds (another great Fiskars punch) and then punched three butterflies from scraps of patterned paper.  I used a pen to add the trails to show movement, then stamped the sentiment.  I love how the card turned out!


When I saw the Jester border punch, I knew it would be perfect for a layout about our family's 2011 Halloween costumes.  I love the way the Jester border punch sets off the pictures.


 My final project was a "40" card using the Jester border punch again.  I've had a crown-shaped canvas accent for a long time and couldn't figure out how to use it.  The Jester border punch made a perfect background for it.  As you know, I'm celebrating my 40th birthday in March.  One of my high school friends will be getting this card later in the year when she hits 40!


I am so excited to have joined the elite Fiskateer ranks and earned my "double O" status!

2/20/12

A Layout without Journaling (gasp!)

This is my latest layout for the Scrapping Stamper Design Team.  


And here is Shannon's sketch.


With the exception of the black cardstock (Bazzill) and the numbers (Prima), everything is from a collection I won from SEI.  I love the colors and the die cuts were so easy to work with.  There's a lot of sparkle and shine that doesn't show in the scan, especially on the blue paper and the ornament.

This layout came together so quickly and easily.  That was in part due to the great sketch, and also the fact that I had a complete collection with all the accessories to work with.  But another major factor is that I didn't include journaling.  That's really rare for me.  I'd say 99% of my layouts have journaling, and often a lot of it.  (That's what slows me down so much- figuring out how to squeeze in all that I want to say in an attractive manner.)  But for the annual Christmas picture, I usually skip the journaling.  It's obvious who we are because the layout is in the album with all the other properly-journaled layouts, and the date is there, so there's nothing else I really need to say.  One day I'll have to do a layout with the outtakes from our photo sessions - I'd certainly have a lot to journal about that!

2/17/12

Maintaining Supply Lists

When I first started 'modern' scrapbooking, I couldn't have named a paper manufacturer to save my life.  I knew about Fiskars tools and Mrs. Grossman's stickers, but that was about it.  When I joined the Design Team for my local scrapbook store in 2008, it was suddenly very important that I know exactly who manufactured what.

My very first Design Team assignment was to create a one-page layout about ice cream for a scrapbooking summer day camp for kids.  It needed to be low cost and easy for the young girls to finish during camp.  Here's what I made: 


The store owner gave me a notebook to record information about all my projects.  I listed everything I pulled from the shelves, then scratched things out if I didn't end up using it on the project.  Here's the first page of that notebook.  You can see the ice cream project in the upper left hand corner.   


Unfortunately, the owner decided to close the store just a few months after I started on the Design Team.  It was devastating.  Not only did I lose my beloved local scrapbook store, but I lost what I had grown to consider a dream job.  Being paid to scrapbook was amazing.  I loved every minute of it.  And, more than anything else has, it changed me as a scrapbooker.

One example: Once the store closed, I no longer needed to maintain detailed supply lists for the projects I made.  But I continued to do so.  Over the years, I have been incredibly grateful that I developed this habit.  I can't tell you how many times I've checked my notebooks to see what supplies I used for a particular project.

Here's a look at the notebooks I use.  They're simple lined Memo books.  I put a big number on the front and the starting and ending date on the back.  I used to hang them on my pegboard, but as you can see, my current notebook doesn't have a hole.  Apparently they don't sell them with holes anymore, which is annoying.  I'm sure I have a tool around here to create a hole, but I haven't tried yet.


Here is the information for two recent layouts.   As you can see, I list all my supplies and attach a piece of the paper strip if I have it.  I try to be as detailed as I can.


Do you maintain supply lists?  What is your system?

2/16/12

Happy Birthday Orange-Handled Scissors!

As I mentioned yesterday, Fiskars' iconic orange-handled scissors turn 45 this year.  The Fiskateers held an online birthday party to celebrate the big occasion.  And of course I joined in the fun!

I already told you about the orange bread I made.


I also made a card,


a festive party hat,


and coordinating party favors.


The party was great fun!  Happy birthday Orange-Handled Scissors!

2/15/12

The Weirdest Recipe I've Ever Tried

Some things you should know:

  • The iconic Fiskars orange-handled scissors turns 45 this year.
  • We have an orange tree in our backyard with far more oranges than we could ever eat.
  • I can't resist trying a weird recipe.

Each Fiskateer was challenged to bake a treat for the orange-handled scissors' birthday party. I wanted to make something orange, but didn't want to just bake something ordinary and add orange frosting. I decided I wanted to actually bake with oranges. I don't think I've ever baked with oranges before, even though I bake with lemons all the time. (Why is that?!) Google to the rescue. After reading through many recipes, I found one called Blender Quick Orange Bread on the Sunkist website. Using a blender to make bread? Intriguing!

But wait... the recipe calls for an UNPEELED orange. What the heck?! I decided I HAD to try this recipe. I once had a coworker who ate oranges the way normal people eat apples- she'd wash the orange, then take a big bite (peel and all), rotating as she took bites. She remains to this day the only person I know who eats orange peels. Could orange peels in bread taste anything other than bitter and disgusting? I had to find out.

I was so sure that the bread would be bad that I decided to make two versions of the bread- one with the peel, as called for in the recipe, and one without the peel. I kept all other variables the same.


Following the directions, I washed the orange and cut it into chunks with the peel still on. 


It felt REALLY weird putting them into the blender like that. Steve took a picture of the big moment.


The end result looked fairly normal and inoffensive in the blender.


I finished the batters and put both versions into the oven. After 45 minutes, the house smelled amazing. I checked the bread. The bread without the peel had fallen slightly in the center. It tested done. The one with the peel had not fallen and was still a bit gooey. I baked that one for 5 more minutes and then checked on it. It tested done. Interestingly, the center had fallen slightly and matched the other bread.


I whipped up an Orange Julius for each of us while waiting for the bread to cool. When the bread was cool, I cut samples from each loaf and we sat down for our taste test.


The verdict? Both were delicious, but we actually preferred the one with the orange peel! I couldn't believe it. There was no bitterness, just a bit more orange flavor. I never would have guessed. The next time I make this (and I will be making it again for sure), I'll be leaving the peel on.


Blender Quick Orange Bread

                                    1 orange, unpeeled                            1 tsp. pumpkin pie spice
                                    1/2 c. orange juice                            1/2 tsp. salt
                                    2 1/2 c. flour                                     1 1/4 c. sugar
                                    2 tsp. baking powder                          2 eggs
                                    1 tsp. baking soda                              1/4 c. butter, melted

Wash the orange, then cut it into large chunks. In a blender, combine orange chunks and orange juice. Blend until almost smooth. Set aside. Combine flour, baking powder, baking soda, pumpkin pie spice, and salt. Set aside. In a large bowl, combine the sugar, eggs and butter, then beat until smooth. Add the orange mixture and dry ingredients to the bowl, stirring just until blended. Pour into a greased 9x5x3 inch loaf pan and bake at 350° for 45-50 minutes. Cool for 10 minutes, then remove from pan. Cool completely on a wire rack.

2/14/12

Kylinn and Trevor

In honor of Valentine's Day, I thought I'd share a layout about Trevor and his best friend Kylinn.  They are seven weeks apart and have been best friends since they met when Trevor was 7 months old.  I have an envelope labeled 'K&T' where I put cute pictures of the two of them together.  For this layout, I chose eight of my favorites and cut them into squares.


After I finished this layout, I dug through the albums to look at the previous compilation layout I'd made about Kylinn and Trevor.  It is from 2009.  By sheer coincidence, I used exactly the same layout design! 


I love making layouts like this that use pictures from many different events to show a relationship.  The pictures of Kylinn kissing (frequently reluctant) Trevor crack me up.  What a gift to have such a wonderful friendship.

Happy Valentine's Day!

2/13/12

40 Things

In 4 weeks, I will be turning 40.


I'm excited.  I didn't do anything extra special for my other milestone birthdays, so I've been thinking long and hard about how I want to celebrate this one.  I decided that I want to spend my 40th year trying 40 new things.  Starting on March 12, I want to go places I've never been, eat things I've never tasted, cook things I've never made, try crafts I've never attempted, and learn things I've never known. 

I won't be jumping out of airplanes, running a marathon, or climbing mountains.  I'm not a daredevil or a glutton for punishment, nor am I trying to prove anything.  Unfortunately, Steve was laid off recently, which means that our family is surviving on unemployment and rapidly dwindling savings.  So my 40 Things have to be inexpensive.  Even though I've always wanted to visit the Ice Hotel in Quebec, we will not be going there this year.  My 40 Things will be much less grand, but I'm hoping that the experience will still be rewarding.

Here's where you come in- I need help adding items to my list.  Here is a sampling of the things I've thought of so far:

  • Make tortillas from scratch
  • Go to a drive-in movie
  • Try absinthe
  • Make popovers
  • Try glassblowing
  • Make fortune cookies
  • See the Harlem Globetrotters in person
  • Make hollandaise sauce
  • Make soap
  • Try Afghan food
  • Flambe something
  • Make risotto
  • Visit Conservatory of Flowers in San Francisco
  • Do a planet walk

I have some more, but this gives you an idea of what I'm planning.  I can't wait to hear your ideas!

2/10/12

Paper Manufacturers

When I first started 'modern' scrapbooking, I would visit the local scrapbook store, wander aimlessly with no plan, and buy whatever random sheets of paper struck my fancy.  I'd get three of the same sheet (so that, in theory, I could use two as backgrounds for a 2-page spread, then one more for matting photos.  I don't think I ever actually did that.)  I never had a plan for the papers.  I never bought anything to coordinate with those papers, nor did I even notice that most paper was part of a coordinating line of products.  I didn't pay attention to who the manufacturer was and I didn't pay any attention to the quality of the paper.  Of course, I didn't know it at the time, but I bought a LOT of paper that I would never use.  Often, I had three matching sheets that I didn't use.

Times have changed.

In 2008, I started on my first Design Team.  Wow, what an awakening that was for me!  For the first time ever, I needed to know who manufactured what product and what line it was from.  I needed to know what was current, what was hot, and what the price points were.  That changed my way of thinking and my way of scrapping forever.  For the better, of course.

Now I am very familiar with all the major manufacturers of scrapbook paper.  I can discuss their different styles and lines intelligently.  I can recognize many papers and most of the signature fonts that manufacturers use.  I have a core group of favorites.

One of my latest favorites is Bella Blvd.  When I first saw a collection from Bella Blvd, I thought it was too cutesy and busy for me.  What I didn't appreciate at the time is that the papers are far more versatile than I thought.  The papers are two-sided (with one side less busy than the other), the colors are bold, and the style is clean.  It's a good fit for me.  Here's a layout I made using Bella Blvd's "Finally Fall" line.


Have you used Bella Blvd?  Do you pay attention to manufacturers?  Who are your favorites?

2/9/12

Grape-Nuts Cookies

I recently bought a box of Grape-Nuts that advertised a free sample of a Grape-Nuts cookie inside and had the recipe printed on the outside.  I love Grape-Nuts and I love cookies, so this was a must-try.  Trevor and I eagerly baked up the cookies.  (He loves Grape-Nuts and cookies too.)   

Here is the picture from the box.  They looked good- like a cross between oatmeal cookies and granola bars.  But the small print that said "homemade cookie will differ from sample" left me confused.  Why provide a sample if the one you make yourself won't be anything like it?


Especially when the sample is SO MUCH WORSE!  Here is the sample cookie (left) next to our homemade cookie (right).  Our homemade one looked just like the one on the box, while the sample clearly did not.  They both tasted good, but the homemade one was 100 times better. 

I am so glad I didn't eat the sample cookie before baking our own.  The sample, while good, wouldn't have motivated me to try the recipe.

Of course, being me, I couldn't just try the recipe as is.  I split the finished dough in half, baked the first half according to instructions, then dug around the pantry to find something to add to the dough to personalize it.  Butterscotch chips- yummy!  I added a bunch to the dough and baked those up. 

Interestingly, even though I used the same pan for the same time in the same oven, these baked more quickly.  I wish I'd noticed and pulled them out a minute or two sooner.  They were delicious, but I don't think the butterscotch chips added much to the cookie.  When I make these again (and I will!), I'll stick with the original recipe.


Grape-Nuts Cookies

                           1/2 c. butter, softened               1 tsp. baking soda
                           1/2 c. brown sugar                     1/4 tsp. salt
                           1/2 c. sugar                                2 c. rolled oats 
                           3 T. honey                                  1 c. flour
                           2 eggs                                        1 c. Grape-Nuts
                           1 tsp. vanilla

Beat butter and sugars in large bowl at medium speed until smooth.  Add honey, eggs and vanilla and mix well.  Add baking soda, salt, oats, flour and Grape-Nuts.  Combine just until mixed.  Drop rounded tablespoons of dough onto cookie sheets.  Bake 10-14 minutes at 350° or until golden brown.  Cool 2-3 minutes then remove from baking sheets.  Cool completely on wire racks. 

2/8/12

Using Sketch 1

In January, I made my very first sketch using Open Office Draw.  I finally finished a layout using that sketch.  It's been sitting on my desk 90% finished since mid-January.  Here's the layout:  


And my sketch:

I have a bunch more sketch ideas brewing, including some two-pagers... featuring lots of photos, of course!