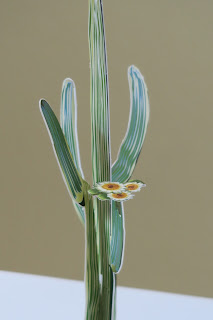
Trevor had never been to Arizona, so when I traveled there for the Creativation show in January, we turned it into a family vacation. And we brought Little Passports with us.
Little Passports was a great way to pass time at the airport. First, we learned about Petrified Forest National Park, which Trevor desperately wanted to add to our already-full itinerary. Someday! Then we learned all about the Grand Canyon. That's another Arizona destination on Trevor's bucket list. We enjoyed the photos of the wacky attractions located along Route 66. One of them is Meteor Crater, a mile-wide hole left when a meteorite hit Earth 50,000 years ago. That one is on Steve's bucket list!
The activity about the different climates in Arizona was very interesting. I'm glad we were in Phoenix in January and not the summer! We read all about Arizona history and famous events that happened there. Next, Trevor followed the directions to draw a gila monster. He added a cute smile, since they are gentle (but poisonous) lizards. The activity about making shadow puppets of Arizona wildlife was neat, but that had to wait until we got to the hotel.
We saved the rest of the Arizona Little Passports activities for when we were back home. Trevor made us delicious chicken fajitas for dinner that night. Yum!
The science activity was really cool. It was inspired by Arizona's status as the #1 producer of copper in the US, which I didn't know. The experiment was the usual clean-a-penny-with-vinegar, but with a twist. Instead of soaking the pennies, rinsing them and admiring how shiny they became, this takes it a step farther and does a great job showing how copper reacts with oxygen.
The model was a cactus.
We certainly saw a lot of cacti in Arizona. One of Trevor's favorite places he visited was the Desert Botanical Garden.
Our final activity was making a bolo tie. We'd seen a really clever piece of public art involving bolo ties in Phoenix that Trevor had loved, so he was excited to make his own. We deviated from the instructions a little bit.
Bolo Tie
Materials:
- wood disc
- large button
- hot glue
- straw
- scissors
- black cord
- scotch tape
- wooden beads
Steps:
Glue the button to the wood disc. Cut the straw into two small pieces and glue the side by side on the reverse side of the disc.
He loves the Hot Glue Gun Helpers! (affiliate link)
Cut a length of cord so it fits around your neck with the ends dangling down. Wrap a small piece of scotch tape around the ends of the cord, like a shoelace. Thread the cord through one piece of straw and then through the other. It should be a tight fit so that friction holds the bolo tie in place.
Thread the beads onto the ends of the cord. Tie a knot on each end, then trim the tape off the bottom. Add a dot of hot glue to keep the cord from fraying.
Now put a wrinkled too-large dress shirt over your bulky sweater, try on your bolo tie and pose for a photo! (That's not actually a step, but it's what Trevor did.)
Trevor and I had great fun exploring Arizona together, both in person and virtually through Little Passports. As always, we learned so much and had great fun together.


So glad you guys had fun while you were here! Loving his bolo tie!!!!!!!!!!!!!!!
ReplyDeleteIt's great that Trevor is learning so much from Little Passports. Such a great way to explore your vast country!
ReplyDelete