9/29/17

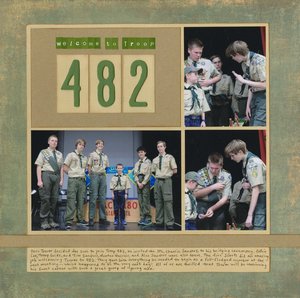
Welcome to Troop 482

When Trevor had his Arrow of Light ceremony (marking the completion of Cub Scouts and the transition to Boy Scouts) back in March, five Scouts came to his ceremony to officially welcome him to Troop 482. They presented him with his neckerchief, uniform numbers, handbook, t-shirt, and everything else he needed to begin as an active member of Troop 482. He didn't have to wait long, as his first troop meeting was the following day! 

Welcome to Troop 482 (affiliate link)

Trevor has now been with Troop 482 for 6 months and couldn't be happier. And just like Cub Scouts, Boy Scouts has become a family affair. Steve started out as an Assistant Scoutmaster and will take over as Committee Chair in October. I am in charge of all the service projects and recently participated in my first board of review. Yea, Scouts!

9/28/17

Craft Roundups: Aliens, Apples, Dogs, Rocks and More

I've said many times before that my favorite thing about my job as Editor of Fun Family Crafts is creating roundups for holidays or themes. It's getting paid to play with PicMonkey. Here are the latest.

--------

Did you know that July 2 is World UFO Day? Believe it or not, when you run a kids' craft website, that kind of thing is important. I made this roundup of UFO and alien crafts to promote it. Can you spot the one that I made?

UFO and alien crafts roundup

Next up, Apple Crafts. One of these is mine from way back when I was teaching Trevor cursive.

roundup of over 75 apple crafts

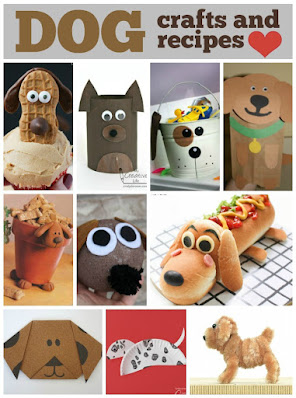
The next roundup is Dog Crafts. Two of these are mine. 

collage of dog crafts for kids

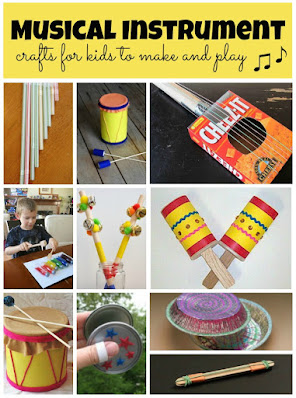
'Make Strange Music Day' is in August, so I made a roundup of all of our musical instrument crafts. Most are made with recyclables, including the one that is mine. It shouldn't be too hard to spot, since Trevor is in the picture!

ideas for musical instrument crafts that kids can make

I'd already made a roundup of rock crafts, but we've added so many recently that I updated the graphic. There are now more than 100 on our site! One of the ones below is mine. 

ideas for over 100 crafts kids can make using rocks

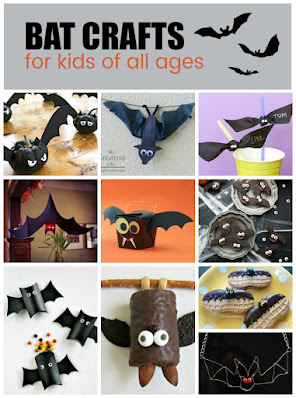
I've had bats on the brain! This roundup of bat crafts and recipes was so much fun to put together. Two of these crafts are mine, both inspired by watching the Bat Flyout

roundup of fun ideas for bat crafts that kids can make

Finally, I did a roundup of crafts, games, and foods that glow in the dark. None of these are mine, but I'm totally inspired to give all of them a try!

ideas for party games, crafts, and foods that glow in the dark

As usual, I did all the graphics with PicMonkey. I love PicMonkey.

9/27/17

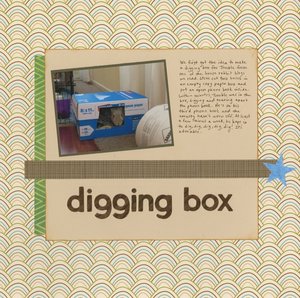
Digging Box


You know how cats cannot resist climbing into a box? Rabbits are the same way. Any sort of box, tube, tunnel, or passageway is rabbit paradise. And it's even better if there's something fun to chew or dig inside. Trouble's digging box used to hold copy paper. Now it holds an open phone book. Trouble loves to dig and tear at the phone book. It takes him awhile, but eventually it's completely shredded, we replace it, and the destruction starts anew. 

Digging Box (affiliate link)

Not only is it completely adorable, but it gives Trouble an appropriate place to dig so that he doesn't dig up the carpet or furniture. Oddly, he doesn't dig when he's outside. He spends all his time exploring, which is also completely adorable. 

9/26/17

MunchPak

It's no secret how much I love trying new-to-me foods. I particularly like trying foreign foods, which is why I absolutely love when a MunchPak shows up on my doorstep! Here's what came in my latest box:


As tempting as it was to tear everything open and try it immediately, I restrained myself. I restrained Trevor, too. He was SO excited! I can't tell you how awesome it is to have a kid who is an adventurous eater. Steve doesn't have much of a sweet tooth, but he was still interested in trying everything. The three of us opened and split an item or two a day over the course of a week. 

As you can see, our MunchPak contained 12 items, including a mix of sweet and savory snacks, plus a drink. There are three sizes of MunchPaks available: one with 5+ snacks (you can see a review here), one with 10+ snacks (which is what mine is), and one with 20+ snacks. You can get a one-time box, or sign up for a subscription lasting 3, 6, or 12 months. When you order from MunchPak, you can get a random mix like mine, or you can customize your order for an extra fee. I think the random is more fun.

You can also select whether you prefer foreign or American foods. I am all about the foreign foods! I am particularly excited when the packages don't have any English on them and the pictures don't offer any clues either. For example, what would you expect this snack from Poland to taste like?


If you said vanilla frosting, then you are correct! These treats had a shell of crusted frosting, with a softer (but not spreadable) frosting inside. They had a strong vanilla flavor with a tiny bit of tang to them. I have no idea why there is a sailor on the package. 

Here's another Polish treat. There's no English, but there are some clues on the package. If you look carefully, you can see a cola bottle in the bottom right and bubbles coming up from it. The character is holding a fizzing test tube. 


Sure enough, this hard candy tasted just like cola. And it had a surprise fizzy filling inside. Yum!!

The next treat was from Northern Ireland, and thus had English on the package. While I prefer the mystery of "What am I eating?!", it's nice to be able to read the ingredient list. These tasty smoky bacon 'crisps' had a delicate meaty flavor... but they were vegetarian. I would have sworn they had meat in them. 


In addition to Poland and Northern Ireland, our MunchPak had snacks from Spain, the Netherlands, China, Japan, England, and Slovakia. We had great fun snacking our way around the globe and can't wait for our next MunchPak to arrive!

MunchPak makes a great gift for anyone who would love a care package showing up in the mail. I think it'd be especially good for college students or loved ones in the military. Or pretty much anyone else.
9/25/17

Paper Plate Beaver

Part of my job at Fun Family Crafts is to make sure we have the widest possible variety of craft tutorials. Rather than add to a topic that is already has dozens of great ideas, I'm always looking to see what we don't have represented. We literally have thousands of animal crafts, yet exactly one of those is a beaver. So I made a paper plate version of this fascinating rodent. 


----------


Paper Plate Beaver


Materials:

  • paper plate
  • brown paint
  • scissors
  • construction paper (brown, black, white) 
  • black pen
  • craft glue


Steps:


Paint the paper plate brown, then set it aside. While it is drying, cut out two small circles (eyes) and one oval (nose) from the black construction paper. Cut two rounded ovals (ears) from the brown construction paper. Cut two rectangles (teeth) from the white construction paper. 

When the paint is dry, cut the bottom of the paper plate to form the beaver's cheeks. Discard the smaller piece.


Glue the ears behind the paper plate at the 2:00 and 10:00 positions. Glue the nose to the front of the plate, slightly below center. Glue the teeth behind the bottom of the plate. 


Experiment with where you want the eyes. I think that close together is cuter...


... and farther apart is more realistic. 


Use the marker to add whiskers. 


Here's some fun facts about the American Beaver.

  • Beavers are the largest rodents in North America and second largest rodents in the world (the largest is the capybara).
  • A beaver’s incisors are harder on the front than on the back. This way the back wears faster, creating a sharp edge that lets a beaver cut easily through wood. 
  • Beavers are herbivores. They eat aquatic plants and the soft inner bark of trees. Beavers store green branches underwater so they can eat them throughout the winter.
  • The world’s largest beaver dam is in Alberta, Canada and measures 2,790 feet long.  
  • Beavers can hold their breath underwater for up to 15 minutes.
  • Oregon and New York have both named the beaver as their state animal. 

9/22/17

LEGO Ninjago Movie Finger Puppets

Our family is so excited about the LEGO Ninjago Movie, which opens today! If it's anything like the LEGO Movie or the LEGO Batman Movie, we're going to love it. The wonderful people at LEGO sent us a big box of fun Ninjago Movie stuff to go along with the movie release. Trevor was absolutely thrilled. 


I watched with interest as he opened the three blind bags and assembled the minifigs. I think that's Lloyd (the green ninja) on the right. Is he eating cereal? And who are these other two characters? I love that the girl is wearing a Unikitty shirt and the other has a Batman shirt under a lab coat. I'm assuming both are nods to the previous two LEGO movies. I'm eager to see how they fit into the plot. 


The second Trevor was done with the minifigs, he started building the main kit. While he did that, I made LEGO Ninjago finger puppets. 


Here's what our dining room looked like. Trevor was hard at work on one side of the table, while I had the iPad open to help me make ninjas on the other side of the table. 


I'm really happy with how my puppets came out. "Hi-ya!"


LEGO Ninjago Movie Finger Puppets


Materials: 

  • cardstock (red, green, blue, black, white, yellow)
  • heart (or circle) punch that makes a hole big enough for your fingers
  • Sharpie (black, silver)
  • scissors
  • craft glue

Steps:


Cut the cardstock into rectangles. Punch two holes toward the bottom. Use the black Sharpie to draw details on the red, white, green, and blue ninjas. Use the silver Sharpie to draw on the black ninja's details.

(Oops. Forgot to draw the pants before taking the photo.)


Cut the yellow cardstock into a rectangle with the top and bottom edges curving inward. Draw on eyes and eyebrows with the Sharpie. Trevor was adamant that I get the correct eyebrows on each character. I'd never noticed they were different. 


Glue the eyes onto each ninja. 

To use the puppets, put two fingers through the holes. Rest your hand on the edge of a table, or behind a sheet of posterboard. 


Wiggle your fingers to make the ninja kick. Hi-ya!  


Thanks again to LEGO for all the fun toys and gear! We can't wait to see the movie!


9/21/17

Vegetarian (or Not) Taco Soup

We're finally leaving summer temperatures behind and getting into soup weather. One of my favorite easy fall meals is taco soup. 


Taco Soup

Base Ingredients:

  • 1 can diced tomatoes
  • 1 can black beans
  • 1 can corn
  • 1 cup salsa

Extras:

  • cooked rice
  • cooked chicken, beef, or pork
  • shredded cheese
  • avocado
  • sour cream
  • tortilla chips


Combine the tomatoes, beans, and corn in a sauce pan. Do not drain the liquid. Stir in 1 cup of salsa. It can be purchased or homemade and lets you customize the soup to your desired heat level. Bring to a boil, then turn down to low and let it simmer for 5-10 minutes. You can stop here if you want. The soup is perfectly tasty just like this. It's vegan, too. 


But I think it's much better with the add-ins. There's no right or wrong. If you have leftover rice, add it. If you have leftover ground or shredded meat, add it. 

Ladle the soup into bowls and garnish with shredded cheese, avocado, and/or sour cream. Serve it with tortilla chips. 

9/20/17

Boardwalk Craft

This post contains affiliate links. 

I know summer is behind us, but I have boardwalks on my mind. I'm deep into planning our next big trip, which will take us east to several states that are famous for their boardwalks. I don't think we'll actually be visiting those boardwalks on this trip (as I'm already packing in way more activities that a reasonable person would even consider), but we will definitely go to at least one Atlantic beach. 


Boardwalk Craft 


Materials:


Steps:


Cut or tear the water patterned paper approximately in half and layer it on top of the sand patterned paper. Glue it in place. 

Lay the skewers horizontally across the paper. They should reach from end to end without extending beyond the paper. If the skewers are too long, trim them. If the skewers are shorter than the papers, trim the papers so they are exactly the same as the skewers. 

Pull fluffs from the cotton balls to mimic the surf. Glue them in place.  


Put the skewers down parallel to one another on your work surface. Arrange the mini craft sticks across the skewers so they look like a boardwalk. Completely fill the skewers, then glue them in place. 


This gives you a sense of scale for the mini craft sticks. 


When the boardwalk is dry, turn it over and add glue along the length of the skewers, then glue them to the sand portion of the paper. 

Decorate the beach with stickers, such as a shovel and pail, a sandcastle, or a sea star. 

9/19/17

Paper Plate Volcano

As I was walking home from school drop-off, an idea for a paper plate volcano popped into my head. I have no idea why, as it's not like there's a volcano between our house and the middle school. When I got home, I whipped up my volcano. It came out exactly how I'd hoped and it was ridiculously fun to do the lava. I love my job. 


Paper Plate Volcano


Materials:

  • paper plate
  • scissors
  • stapler
  • paint (grey, black, red, orange)
  • paintbrush
  • sponge
  • cotton ball


Steps:


Use the scissors to cut a straight line to the center of the plate, then cut out a hole a little smaller than a dime. It does not need to be neat or exact. 


Overlap the cut ends of the plate to form a cone. Staple it to hold the shape.


Paint the volcano grey. 


Squirt some grey paint and black paint onto a surface. (I'd normally use my Frisbee, but I needed a second paper plate for another project, so I just used that.) Dip a dry sponge into the paint and pounce it all over the volcano. Repeat until the whole thing has a mottled look. 


There's no precision necessary. You're just trying to break up the grey and add the appearance of dimension.


Now comes the fun! Mix orange and red paint together to make lava. Dip the back of a paintbrush into the paint and drip it onto the top of the volcano. The paint should be thin enough to drip, but not so thin that it runs right down. I used Folk Art paint and the consistency was perfect right out of the bottle. You might need to adjust the consistency if your paint is too thick (add a tiny bit of water) or too thin (add a tiny bit of cornstarch slurry). 


Now walk away from your volcano. The paint will continue to run down and then will dry. You can always add more lava if there's not enough. 

When the volcano is completely dry, pull apart a bit of a cotton ball to make steam. Push it up from the inside of the volcano, then gently pull it out the top. It should be wedged in pretty well and will stay in place. If not, make your steam a little thicker or glue it in place. 


Anyone else in the mood for a Hawaiian vacation, or is it just me?


9/18/17

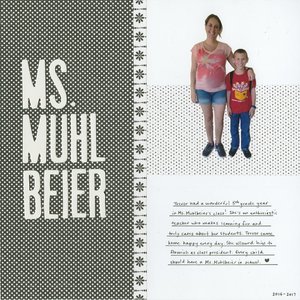
Ms. Muhlbeier

Trevor has been blessed with wonderful teachers during his school career. His 5th grade teacher, Ms. Muhlbeier, was no exception. She cares deeply about her students and puts a lot of effort into building a positive classroom community. She believes in making learning fun and was totally open to having some random mom taking over her classroom every week. Trevor thrived in her class. Thanks, Ms. Muhlbeier!

Ms. Muhlbeier (affiliate link)

To make the layout, I fussy cut the photo to eliminate the ugly background. I layered two black/white patterned papers (the border is actually the back side of the darker polka dot) on white cardstock, glued down the photo, then added the chipboard letters. Finally, I added my journaling. It always makes me a bit tense to journal directly on an otherwise-completed layout for fear of ruining it, but it worked out just fine like it always does. 

9/15/17

Paint Chip Bookmark

I found a random paint chip that I no longer needed, so I turned it into a bookmark. 


And then I put the bookmark in Trevor's library book and waited to see how long it would take him to notice. 


As it turned out, it did not take long at all. Within about an hour, he asked why there was a 'pom pom' near his library book. He got the book, opened it, and discovered the bookmark. He loved it. And now he knows the difference between a 'pom pom' and a 'tassel.' 


----------

Paint Chip Bookmark


Materials: 


  • Paint chip
  • Coordinating yarn
  • Black cardstock
  • Black letter stickers
  • Scissors
  • Paper trimmer
  • Adhesive
  • Hole punch


Steps:

  • Trim the paint chip to the desired size, then cut the cardstock 1/4" larger in both dimensions. Adhere the paint chip to the cardstock. 
  • Punch a hole at the top of the cardstock-backed paint chip. 
  • Add the letter stickers to the bookmark. You can spell out I {heart} U like I did, or use the person's initials. 
  • Make a tassel using the yarn. You can use different colors like I did, or just choose one color. I followed these directions to make my tassel. 


9/14/17

Exploring Oregon Through Little Passports

We had a wonderful family reunion in Oregon this past summer, so it's no surprise that Trevor and I had a lot of fun doing the activities in the Oregon kit from Little Passports!


After building the covered wagon model and reading about the Oregon Trail, we jumped right in with the science experiment. It is inspired by The Old Man of the Lake, a large stump that has been floating in Crater Lake for more than 100 years and seems to defy the laws of physics. Through the experiment, Trevor now understands that the Old Man of the Lake has air trapped in the top of its trunk and is thus less dense than water. Therefore, it doesn't sink.   


Next, Trevor did a maze about the beaches of the Oregon coast. (Yea mazes!) We learned about the attractions in Portland through a map activity, then did some measurement to identify fossils from the John Day Fossil Beds that date back to the Cenozoic Era. We read about the most important events in Oregon history, then matched famous Oregonians with their accomplishments. One of my favorite childhood authors, Beverly Cleary, is from Oregon. 

Trevor and I learned how to make origami trees, inspired by the World Forestry Center in Portland. We have plans to transform our origami into Christmas trees. I'll share a tutorial as we get closer to Christmas.


There were two art activities in the Oregon kit. Yea! Trevor and I had a lot of fun following the steps to make swallowtail butterflies. 


Getting the symmetry right is really difficult! We both did our best, but fell a bit short. No matter. We're still really happy with how they turned out. 


On to our favorite part of each Little Passports adventure - the recipe! The cooking project combined Oregon's state beverage, state nut, and state fruit. Any guesses what they might be?

The state beverage is milk. Oregon's state nut is the hazelnut and the fruit is the pear. Trevor followed the directions to make vanilla ice cream, topped with grilled pears and toasted hazelnuts. Delicious!


Trevor and I learned so much about the Beaver State. Thanks to Little Passports for another entertaining and educational kit!