Pages

6/29/18

Elephant-on-a-Stick

Yeah, that's right. An elephant. On a stick.


It's a delicious mix of salty and sweet, it's ridiculously easy, and they could not be cuter (if I do say so myself). Interested in making some? 

---------

Elephant-on-a-Stick

Materials (affiliate links):


Steps:


For each elephant, you will need one round pretzel that is intact, and three broken pretzel pieces. You might find broken pretzels that are just the right size and shape; if not, break them yourself. It took me about three tries to learn where to break them to get the right size of ears and trunk.


Count out 10 black candy melts and 30 white candy melts. Together, they will make what I now think of as "narwhal grey," which is perfect for elephants. Follow the package directions to melt the wafers, then drop the head and ears of one elephant into the melted candy. Fish out the pieces with a fork (letting extra candy drip down) and place them on waxed paper. 


Use a spoon to fill in the elephant. This was my first one and I slopped over a little bit. Not a big deal, but it does take a few to get the feel for the right amount. Add the nonpareil eyes. 


Dip the trunk, then lift it out with the fork. Let it drain a few seconds before positioning it on the elephant. 


Move on to the next elephants. You'll get about 4 elephants before you'll need to prepare more candy melts. Let the candy harden at room temperature (30+ minutes) or speed up the process by popping them into the fridge or freezer (10+ minutes). 

When the candy has set up, peel each elephant away from the waxed paper. 


Turn all the elephants upside down on the waxed paper. Dip the lollipop sticks into partially cooled candy melts, then place them on the backs of the elephants. Twirl the sticks to make sure they're covered in candy, then let them set up completely.  


That's all there is to it! Elephant-on-a-stick!


What else should I put on a stick? I have a few ideas... stay tuned!

6/28/18

One Son

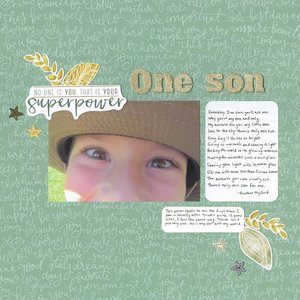
Trevor was a newborn when I first came across Heather Myford's poem called 'One Son.' It spoke to me of the overwhelming love I felt for my one and only son. I wanted to use it on a layout, but for years I didn't. Steve and I felt strongly that our family of three was complete, but what if we changed our minds? Or God's plan for us was different? 

Now Trevor is 12. I'm 46. Steve and I feel as confident as ever that we are meant to be a family of three. So I finally used this poem that has been close to my heart for over a decade.  

One Son (affiliate link)

Trevor isn't just my son. He is my sun and he is my world. It means a lot to me to have this poem, copied in my handwriting, in his album. 

6/27/18

Exploring Georgia Through Little Passports

Time for another Little Passports adventure! This time, our virtual trip took us to Georgia. I have never been to Georgia unless you count airport layovers, which I do not. If I did count layovers, I'd have several trips to Georgia under my belt, which is not surprising since Atlanta is the busiest airport in the United States. (Fun fact: I've flown to/from 28 of the 30 airports on this list and will add one more, Detroit, later this summer. The only other airport I haven't flown from is Logan in Boston.) Anyway, my point in all this is that Atlanta is well-known for having a really busy airport. In fact, the model for the Georgia Little Passports state journal is of an air traffic control tower! 


But, of course, there's SO much more to Georgia than the airport. For example, peaches! Trevor and I jumped right into the cooking project because we didn't want to wait to eat some Georgia peach cobbler. Yum!


Did you know that Atlanta is home to the largest aquarium in the world? We didn't! We also learned that Atlanta is one of the largest media centers in the US, with dozens of TV and radio stations, newspapers, and online job opportunities. That activity had Trevor writing news leads for stories, each with the Five W's. Then we solved a matching puzzle about the Civil War sites in Georgia, which was one of the 11 states of the Confederacy. We did a map activity about Savannah's historic district, learned about the animals (and carnivorous plants!) of the Okefenokee swamp. 

The art project was inspired by the Georgia Sea Turtle Center on Jekyll Island. Here's Trevor as he started beading...


... and here is his completed sea turtle! 


Next, we did an activity inspired by Dr. Martin Luther King, Jr., who was born in Atlanta in 1929. Trevor dreams that, "Schools will be safe places where there is no bullying or danger." I couldn't agree more. School has always been a happy place for me, as a student, then a teacher, and now a parent. It is appalling to me, and completely unacceptable, that any child would feel unsafe at school. Trevor does feel completely safe at school, thankfully, and has never been the target of bullying. 

The science experiment in the Georgia state journal is inspired by the Forsyth Park's fountain in Savannah. Trevor used my beloved Fiskars hand drill (affiliate link) to make a hole in the side of an empty apple juice container. 


He put a straw in the hole and sealed it with aquarium sealant (affiliate link). When it was dry, he filled the bottle with water, put an inflated balloon over the top, and.... well, better for to see for yourselves!


Trevor and I had a great time learning all about Georgia through Little Passports. When we eventually travel there, we're going to have a very hard time narrowing down all the fabulous things there are to see and do. I guess we'll need to make sure to devote plenty of days to this very interesting state!


6/26/18

Hands-On History

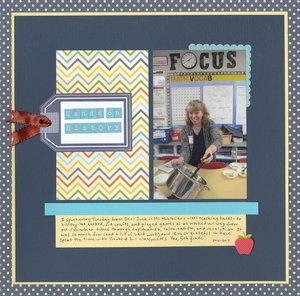
I did a thorough job documenting the hands-on history I taught to Trevor's fifth grade class here on the blog, but I wanted some record in the scrapbook album. I made this page, using what might be the only picture of me taken during a year's worth of history lessons. 

Hands-On History (affiliate link)

What fun memories! I really do love teaching, particularly when I get to come in when I want, teach my favorite subject, and leave all the discipline, paperwork, staff meetings, etc. to the actual classroom teacher! Thanks, Ms. Muhlbeier. It was an honor and a privilege to teach your students.

6/25/18

Banana Split Bread

I recently discovered some overripe bananas I'd thrown in the freezer months ago. The three of us don't love bananas, but when we do eat them, we prefer them to be barely yellow. Trouble likes them fully yellow, but rejects them when spots appear. So into the freezer they go. Obviously, overripe bananas means banana bread. I decided to experiment and see if I could come up with a bread that used the bananas but had other flavors that we prefer more than bananas. I dug around in the fridge and pantry and found strawberries, crushed pineapple, maraschino cherries, and mini chocolate chips. Put them together and you get Banana Split Bread!


I thought I might have invented something unique, but a quick Google search revealed that I am not even close to the first. It's already a thing. Great minds think alike, I guess!

I used my favorite banana bread recipe, but replaced half the banana with crushed pineapple. Then I stirred in chopped strawberries and maraschino cherries. 


I added the fruit mix alternately with flour, baking powder and baking soda to creamed butter and sugar. 


Finally, I stirred in mini chocolate chips. Such a pretty batter!


The bread was delicious. Less banana taste (which is a good thing if, like me, you don't love bananas) and fun mix of flavors in each bite. 


---------

Banana Split Bread


                          1/2 c. butter, softened                                             5 large strawberries, chopped
                          1 c. sugar                                                                    5 maraschino cherries, chopped
                          1 egg                                                                           2 c. flour
                          1 mashed ripe banana                                             1 tsp. baking powder
                          1/2 c. crushed pineapple                                         1/2 tsp. baking soda
                          3 T. juice from crushed pineapple                          1/2 c. mini chocolate chips


Cream butter and sugar in a large bowl. Beat in egg. In a separate bowl, mash the banana. Stir in pineapple and juice, strawberries, and cherries. In a third bowl, combine the flour, baking powder, and baking soda. Add the flour mixture and the fruit mixture alternately to the creamed butter and sugar. Fold in chocolate chips. Bake at 350°F in a greased 9x5x3" loaf pan for 60-70 minutes or until a toothpick inserted near the center comes out clean. Let the bread cool in the pan for 10 minutes, then remove and cool completely on a wire rack. 


6/22/18

Crab Camp

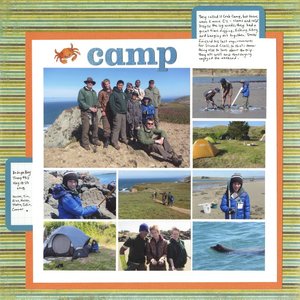
In May, Trevor's Boy Scout troop camped at Bodega Bay, where they dug for clams and fished for crabs. They referred to the trip affectionately as Crab Camp. Crab Camp was a great success... as long as you measure success by the boys having a great time and not by how much they brought back for dinner! The Scouts successfully dug up dozens of clams, but they were not safe to eat. The group caught exactly one crab that was legal sized, which is not quite enough to feed a group of hungry boys and leaders. Some dads saved the day by buying crabs to supplement the catch. And, of course, the Scouts always practice their motto of "Be Prepared" and had brought plenty of other food along. 

When I chose the photos to use, I knew I wanted to include a group shot, photos of Trevor digging and fishing, a picture of the campsite, and the photo Steve got of the group hiking toward Bodega Head. I added a shot of three of the Scouts, Trevor huddled behind his tent (which was acting as a much-needed wind break), and a picture of the reason why the boys' bait kept disappearing (aka the California sea lion). 

Crab Camp (affiliate link)

I put together my block of photos, leaving space at the top for the title. I thought I'd be able to squeeze in my journaling to the right of the title, but it wasn't enough space. So I split a journaling card and allowed the writing to spill from the card to the white space next to the title. I've never done that before and I'm not sure I love it aesthetically, but it's more important to me to get the details down that to have everything look perfect. I used the second half of the card to add the who, when and where, which serves the double purpose of bringing the eye to the photo of Trevor. 

6/21/18

SF MOMA

Our family loves to visit museums when we travel, yet there are quite a few museums close to home that we've never visited. When my friend Kirsten of Twenty Stitches offered up guest passes to the San Francisco Museum of Modern Art, I happily accepted! We'd never been there and this was just the incentive we needed to plan a visit. 


We invited Steve's parents to join us at SF MOMA. Here they are with Trevor and me, sitting at an ingenious table. The table stair-steps across the entire length of the room (seating maybe 20) with each tabletop and chair slightly larger than the next. No matter how tall or small you are, there's a spot that is just your size. 


There's a spider that's just your size, too. Different artist, equally cool, somewhat less utilitarian. 


The special exhibit, which runs through October 28, features the later works of surrealist painter Rene Magritte


Surrealism is not my favorite, but I still thoroughly enjoyed looking at his artwork. This gallery was particularly fun. When you looked at a particular 'window' or 'door,' you might see yourself projected back in a different location, or you might see somebody standing elsewhere in the building. We enjoyed trying to figure it all out.


I can't believe Trevor is already 12 years old!


We had only gotten through 2 of the 7 floors before lunchtime. We ate at the delicious, albeit somewhat pricy, Cafe 5. Everything was fantastic. You can choose to eat indoors, which we did....


... or you can eat in the sculpture garden. I didn't realize SF MOMA has one of Robert Indiana's famous LOVE sculptures. (Turns out there are 23 in the United States and more worldwide.) 


We recognized the work of Tom Otterness right away. We first discovered his artwork in Phoenix while doing the Urban Adventure Quest


I love taking pictures of Steve taking pictures of Trevor. I should make a layout with all of them one of these days. 


This artwork was very interesting. It's a collection of all the ways you can arrange three or more adjacent sides of a cube, arranged by number of sides. The wall has diagrams of all the combinations. The picture only shows a small portion of them. 


This piece by Chuck Close was one of my favorites from SF MOMA because it was just so interesting how the viewer's perspective made such a difference. Up close, you see colorful diamonds filled with circles, triangles, and irregular shapes. 


Back up, and those shapes have meaning. 


Keep backing up and you see the whole face.


Here's another portrait by Chuck Close but done in greyscale. When you back up far enough, the huge painting looks like a grainy photo.


Move closer in, and you see the many shapes that create the face.


Stand close enough, and it's hard to see anything but the shapes and the shades of browns and greys. 


We passed on the bunny light in the gift shop, but I can't say it wasn't tempting.


Huge thanks to Kirsten for the tickets! We thoroughly enjoyed our day.

Because admission to SF MOMA is always free for kids, we only used four of the six tickets Kirsten gave me. Which means I have two tickets to give away to one of you! There is no expiration date on them, but I would like for them to go to someone who will actually use them. If you're local to San Francisco (or will be visiting in the next year or so) and would like free tickets to SF MOMA, leave a comment and I'll pick one of you.


6/20/18

Exploring New Hampshire Through Little Passports

Our next virtual trip through Little Passports taught Trevor and me all about New Hampshire. I hadn't realized New Hampshire has some of the highest peaks on the East Coast. Nor did I know that Mt. Washington in New Hampshire was the site of the fastest measured wind gust in history (231 mph).... until 2010! (The story of how they lost that title is pretty interesting.) To learn more about how wind is measured, Trevor followed the directions to build a model of an anemometer using straws and paper cups.


While this anemometer can't measure wind speed in miles per hour, you can use it to measure revolutions per minute. Trevor achieved some pretty decent speeds by blowing on it! 


The state journal was full of activities about New Hampshire's natural beauty, including the granite peaks, vibrant fall color, and peaceful lakes. The model was of a log cabin that you'd find in the woods or New Hampshire. 


We solved a crossword puzzle about the 5 major rivers that originate in New Hampshire. By unscrambling shaded boxes, we learned one of this state's nicknames: The Mother of Rivers. 

The next two activities were about New Hampshire's role in presidential elections. Since 1952, New Hampshire has been the first state to hold primaries. (It's written into state law: “The presidential primary election shall be held on the second Tuesday in March or on a date selected by the secretary of state which is seven days or more immediately preceding the date on which any other state shall hold a similar election.”) The assignments asked us to create slogans and a campaign poster as if we were running for office. Instead, we imagined what Trouble's campaign slogans would be if he were running for president: "Happy rabbits are cage-free!"

We did a matching and searching activity about the Portsmouth Naval Shipyard, solved a dot-to-dot about the black bears of New Hampshire, and then did the cooking project - hot apple cider. We made apple cider often so it wasn't something new... except for the recommendation to add a teaspoon of maple syrup to the cider. We'd never tried that and, not surprisingly, it was delicious!

Trevor and I had a lot of fun learning all about the Granite State and look forward to exploring it in person together some day.


Thanks to Little Passports for another fun and educational adventure!


6/19/18

The Narwhal Party

This post contains affiliate links. 

Time to share all the fun details from Trevor's narwhal-themed birthday party


For the fourth year in a row, Trevor opted to have his party at the ice rink. It makes everything so easy for me, because all I have to do is bring the cake/cupcakes. They provide everything else. The kids skate, eat lunch, skate some more, eat cake, and skate some more. As long as they'd like, actually. Though after 3+ hours, they were exhausted!


Trevor worked with me to design the cupcakes. Through trial and error, we worked out a way to make cute and easy narwhals. We started by putting toothpicks into Zachary Fruit Slices. Then we dipped each Fruit Slice into a bowl of Candy Melts (10 black discs and 30 white discs mixed to make the perfect gray and enough for 18 narwhals). The toothpick made a very convenient handle that allowed for full narwhal coverage. After dipping each narwhal, we set them on waxed paper to dry, then added tiny black sprinkles for eyes.   


We frosted each cupcake with blue frosting, then nestled in a narwhal. We put our cupcakes directly into our 3-in-1 cupcake caddy (LOVE that thing). Here they are on the dessert table at the party, with Trevor's stuffed narwhal. It was a souvenir from when his Cub Scout pack spent the night 'sleeping with the sharks' at the Monterey Bay Aquarium a few years ago.


Rather than use a boring candle for Trevor's cupcake, I made a few changes to a store-bought whale candle pick and ended up with a narwhal. Here's the before and after:


Just use a fingernail to gently scrape the yellow star and the mouth off the candle. It flakes off easily. Glue a googly eye over the black eye, use a Sharpie to add a smile, and then gently twist a toothpick into the forehead. Remove the toothpick and break it in half. Put a drop of glue in the hole, then put the toothpick back in the hole, broken end first. 


Here's the birthday boy with the narwhal candle lit.


We added one other fun narwhal touch to the party. We started with a wooden dolphin shape and some wood dowels. We broke off the dorsal fin, then used sandpaper to smooth off the narwhal's back. We sanded off the bottlenose to make the rounded snout of the narwhal. Then, we painted it gray. When it was dry, we glued on a toothpick tusk, a googly eye, and a dowel.


The party guests could use the narwhal-topped dowels to create skewers of candy. 


We made one final narwhal item, but did not end up using it at the party. We slit an empty wrapping paper tube vertically, formed it into a tusk shape, then wrapped it with masking tape. It's now a cool ring toss game! 

As always, I loved working with Trevor to plan a fun party to match his theme idea. It turns out that narwhals make a pretty good party theme!