Pages

12/31/18

The Best of 2018

As 2018 comes to an end, it's time to look back over the projects I made this year and pick my favorites. I narrowed it down to 7 kids' crafts and 7 scrapbook pages. 

My favorite kids' crafts:


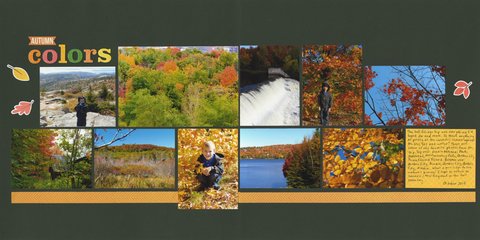
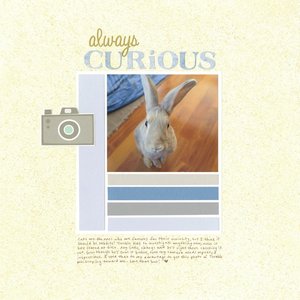
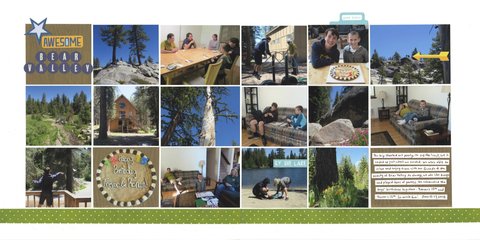
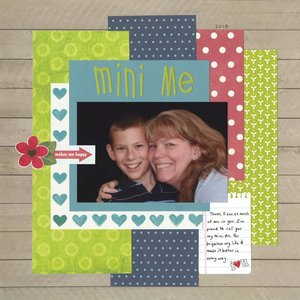
My favorite layouts:


I love looking back over all my projects at the end of the year. I'm always amazed by how much I've created in 12 months. And, I'm pleased that I actually like a high percentage of it! 

If you'd like to look further back, here are my favorites from 2016 and 2017

12/19/18

Merry Christmas!

Wishing you a wonderful holiday season, from my family to yours. 


As usual, I will be taking time off from blogging to enjoy Christmas with my family. I'll be back on December 31 with a look back at my favorite projects of 2018!

12/18/18

Whole Lotta Speakin' Going On

I have three speaking engagements in the next three months. Part of me is saying, "What was I thinking?!" as I'm looking at everything I need to do to prepare (on top of all the regular things I need to do), but most of me is very excited. I love public speaking and I love teaching and I am enthusiastic about my topics.

I told a friend that I had these three classes coming up and that I was stressing about how much work the preparations will be. She asked if I could basically give the same talk three times, since the audiences were completely different. Nope! My three topics could not be more different. (Yet they're all totally me.) I've already told you about two of them:

Come join fellow introverts as Cindy deRosier talks about networking and connecting at Creativation - because you never know who might be the key to the next big break in your business. This seminar will address a variety of things introverts should do at the event and beyond to connect with fellow attendees. Leave with a comfortable strategy for networking. 
Thursday 1/19 at Creativation in Phoenix, AZ


Travel is the ultimate learning experience! Make your family vacations as educational as they are fun. Expect lots of hints, tips, and budget-friendly resources to expand your kids' world (literally!) through educational travel.

Friday 3/8 at Pinners Conference in Ontario, CA


So what's #3? (Well, technically it's #2, because it falls after Creativation and before Pinners.) I'll be presenting at LEAD. (Leader Education And Discovery), which is a leadership training for Scout leaders. 

Join Cindy deRosier for a an action-packed hour of demonstrations and hands-on experiments. Learn how to teach basic chemistry using common household items that will amaze, delight, and educate your Cubs.

Saturday 1/26 at LEAD in Pleasant Hill, CA


With apologizes to Jerry Lee Lewis, there's a Whole Lotta Speakin' Going On.

12/17/18

'We Wish You a Merry Christmas' Art

Many of my ideas come from attempts to salvage a craft that didn't work. Such was the case with this:


I had an idea to use Scrabble tiles to spell out 'We Wish You a Merry Christmas' in the shape of a tree. One problem: those words don't form the shape of a tree. I tried a couple of variations, but ultimately it wouldn't work with the square tiles. "If only I could stretch the letters so they were taller and narrower," I thought. And then I realized that I couldn't stretch Scrabble tiles, but I could draw letters that are tall and thin. 

Step 1 was making a template. I folded a piece of paper in half, then did an accordion fold.


I unfolded the paper and used the fold lines to draw a tree shape and write my words to fit the space. I used pencil so I could erase as needed. When I was happy with the design, I traced the letters with a Sharpie.


I put a clean, unfolded piece of paper on top of my template, used a paper clip to hold them together, then put them on my light box (affiliate link) and traced with a green pen. 


 Then I cut that paper into a triangle.


I used pens to decorate letters. I added holly in the gap between YOU and A, then added little dots of color everywhere. 


Finally, I colored over the whole thing with a light green color pencil. Then I added a yellow star and a brown tree trunk. I love how it turned out.


You can make a large tree and display it on a wall, or make a small tree and use it as a card. Either way, it's really festive. 


12/14/18

Oreo Penguins

When our plans to make an Oreo Christmas tree were thwarted, we made Oreo Penguins instead. 


As you can see, they're adorable but far from perfect. A friend once told me that what she loves the most about my blog is that you don't have to have any talent to make the things I share. She immediately blushed and apologized profusely for implying I don't have any talent, but I thought it was hilarious. It's totally true that my projects are not likely to grace the pages of a magazine (except this once!). My projects are doable and rarely require any special skills or expertise. I consider my talent to be thinking up the ideas, figuring out how they're done, and writing clear instructions, rather than the actual execution of the project. Particularly when it comes to edible crafts! So regardless of whether you have any talent or not, go ahead and give these Oreo Penguins a try! Affiliate links below. 


---------


Oreo Penguins 


Materials:


Steps:


Set the Silpat mat on the table with the cooling rack directly above it. Place 4 White Fudge Oreos on the rack, with enough space between them that you can fit your fingers. Use scissors to cut 4 small squares of aluminum foil. Put them on top of one another and fold them in half vertically. Cut the stack of squares into a half teardrop so that they're vaguely heart-shaped when you unfold them. Separate them and press them onto the Oreos, with the end press down the front. In the photo below, you can see three Oreos with the foil positioned on them, plus one piece of foil that I haven't unfolded yet. 


From another angle, with the fourth Oreo now covered:


Melt about 15 black Candy Melts according to the package directions. Drizzle the melted candy over the tops, trying as best you can to avoid the foil-covered area. 


Let the candy set for just a minute or so, then use the tab of foil at the bottom to lift the foil straight up. If you wait too long, you end up with a rough edge instead of a nice smooth line between white and black. If don't wait long enough, you have to be really careful that the extra candy on the foil doesn't slop onto the white portion. How long it takes the candy to set up depends on your room temperature and humidity, so I can't give you a more accurate guess. 

Transfer the penguins to a plate. If you drizzled aggressively, you may end up with a few penguins that are stuck to the cooling rack. Push up from the bottom of the rack with one hand as you're gently pulling up with the other and it should pop free. If you happen to break one doing this, you have my permission to eat it. None of mine broke, so unfortunately I didn't get to eat one. 

Move the now-empty cooling rack, then peel the dripped candy off the Silpat and put it back into the bowl. Remelt the candy. Set up your next four Oreos and repeat the process of adding the foil, drizzling the candy, and then peeling the foil. 


Continue working, four at a time, until all your Oreos are covered. You may need to add more Candy Melts to the bowl. 

In a separate bowl, melt 3 white wafers. Use a toothpick to dot melted white candy onto the backs of the candy eyeballs, then place them on the penguins. They'll set very quickly, so make sure you put them where you want them and don't try to move them. Add a dab of white candy below the eyes and place a sunflower seed beak there. 

Here are some of the penguins I made. As you can see, they are FAR from perfect.


But they are fun! I learned a lot as I went - what consistency is best for the melted candy, where to position the foil and when to remove it, what happens if you try to dip the penguin in the candy melts instead of drizzling, etc. I figured out what to do as I went. Like anything, the more Oreo Penguins I made, the better they turned out. And for a Scout cookie exchange, these imperfect (yet charming) penguins were perfectly fine.  


And I did eventually get to eat one. Delicious!

12/13/18

Pinners Conference California (March 8-9, 2019)

Big news! I'm going to be speaking at Pinners Conference!


If you're not familiar with Pinners Conference, it is a creative person's dream come true. The two-day conference features 108 classes, exhibits, and shopping, all focused on the kinds of things you see (and drool over) on Pinterest. The classes are divided into the following categories:

  • DIY and Craft: "DIY to Make You Sigh"
  • Food Arts: "Yum Yum Give Me Some"
  • Party Planning: "It's My Party"
  • Home and Home Decor: "Let's Play House"
  • Lifestyle and Learning: "My Wonderful Life"
  • Quilting and Sewing: "Sew Awesome"
  • Photography: "Let's Get a Snapshot"
  • Beauty and Fashion: "Hey Good Lookin"
  • Health and Fitness: "Let's Get Physical"

So what will I be teaching? My class is part of the Lifestyle and Learning track and is all about educational travel.


I'll be sharing all my best my tips, tricks, and hints for incorporating learning into family travel in a way that is easy, affordable, and FUN. I am creating a bunch of printable resources for the class, which is keeping me very busy.

Pinners California takes place March 8-9, 2019 at the Ontario Convention Center in Ontario, California! When you get your tickets, enter the coupon code DEROSIER to save 10% on your purchase. I hope to see you there!

12/12/18

Punched Circle Christmas Tree

This was supposed to be a post about Oreos. But as you can see, this Christmas tree is made of construction paper, not Oreos.


Backing up a bit... we need to bring 2 dozen cookies to an upcoming Scout cookie exchange. Trevor asked if we could bring Oreos. I told him that no, it would not be in the spirit of the cookie exchange to just bring a package of Oreos, but if we did something with them, then sure. We did some brainstorming and I remembered seeing this advertisement for Ritz Crackers in the latest issue of Food Network Magazine. (This is an affiliate link, as are other links in this post.)


Wouldn't it be cute to dip Oreos in green Candy Melts (and one in chocolate for the stem), arrange them like a tree, then add mini M&M's for Christmas lights? Yes, it would be adorable! How fun!

Fortunately, it crossed my mind to actually check how much room it would take to display a Christmas tree made of 24 Oreos. I got out my circle punch and some green construction paper and started punching. I tried several ways to arrange 2 dozen circles, but the tree looked really weird unless I used just 22 circles. Not only that, but the tree was larger than I'd expected.  


We scratched the Oreo Christmas tree idea and will be doing something else creative with our Oreos. I'll share that soon. Never one to let a craft opportunity go to waste, I glued a piece of blue construction paper onto a sheet of white, then glued 15 of my green punched circles on that (it fit better with 5 rows than with the 6th row) and the brown trunk circle. I added a yellow star, then started punching out a bunch of little circles. 


I glued those in diagonal lines across the green circles to mimic the look of lights. 


It's pretty cool to see what you can make using nothing but circles. (OK, and a single star!)


12/11/18

'The Workday of My Dreams' Exercise

I recently took a class on CreativeLive by Jasmine Star (affiliate link here and below) and one of the assignments was to think about the workday of our dreams.


It's harder than it sounds. At least, it is for me.

Part of my difficulty is that I work from home and my day is built around other responsibilities besides work. Ideally, I'd get up and start working right away, as the first thing in the morning is often my most productive time of day. But that is not my reality. I need to get Trevor off to school before I can think about my own workday. I need to stop working in time for the afternoon carpool, no matter how well my work is flowing or what I'm in the middle of doing. There are countless interruptions during the day, some welcome* and others not. I'm sure everyone has their own version of this whether they work from home or elsewhere. 

(*I mean, could you say no to a nose scritch if he asked?)

Back in my teaching days, it would have been much easier to define the perfect workday: all kids 100% on task, learning, and happy with my dynamic, engaging, hands-on lessons that each finished seconds before the bell, with no whining, excuses, tattling, arguing, injuries, parent phone calls, or rain. I never had a perfect day as a teacher (and I find it hard to believe that anyone possibly could!) but it is a worthwhile exercise to figure out what that perfect day would actually entail.

This is the template that Jasmine provided:

I wake up at ___ in the morning and the first thing I do is _. Then I ___ to ensure I'm feeling ____. I start the work day of my dreams at _____ in the morning, but not before taking time for myself to _____. I leave space in my day for ____, and my favorite part of running my business today is ____. Today I made/wrote/produced ____ but I'm most proud of ____. After work I ____ and I have dinner with ____. Before going to bed, I will _____.

Here is my attempt to outline my perfect workday as it fits into my current life:

I wake up at 6:00 in the morning, get myself ready for the day, and greet Trouble, who is ready to play. Then I answer emails, get Trevor off to school, and eat my breakfast to ensure I'm feeling free from distractions. I start the workday of my dreams at 8:00 in the morning, but not before taking time for myself to read blogs and check my personal social media. I leave space in my day for lunch with Steve and at least a half-hour of scrapbooking. My favorite part of running my business is writing blog posts and working on new craft ideas. I work on Fun Family Crafts, post to my business social media accounts, check in with other bloggers, and firm up details for future educational travel. I have the perfect lighting to take photos of my crafts and am most proud that I barely need to edit them before they're ready for blogging. After work, I pick up Trevor, supervise homework while reading the newspaper, and make dinner. We eat together as a family and then play board games together. Before going to bed, we watch Project Runway or another show based on creativity/crafting, then I read an interesting and inspirational memoir. 

Even though the exercise was difficult, I'm glad I did it. I got a lot out of Jasmine's class, as I have with every CreativeLive class I've done. If you are interested, you can purchase their classes to watch at your convenience, or watch them for FREE when they're live on the air or during rebroadcasts. Either way, they are great. And there's definitely something for everyone.

So tell me... what does the workday of your dreams look like?

12/10/18

Ramekins Culinary School:

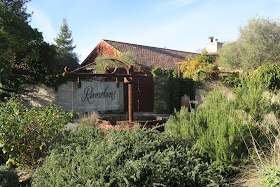
Awhile back, Steve's parents gave us a gift certificate for a class at Ramekins Culinary School in Sonoma. We redeemed it last Sunday. 


Our class was called From the Kitchens of Puglia: Focaccia, Pasta and Panzerotti. Puglia is a region in southern Italy that borders the Adriatic Sea. It makes up the heel of the boot of Italy.


Steve and I were so excited; we both love Italian food (who doesn't?) and were eager to learn to make these dishes from a region we don't know much about. We have attempted several Italian recipes together (most memorably, the Valentine's Day ravioli), but knew we'd learn so much more from a hands-on class than trying it on our own. We totally did and we had a great time. 


I am in love with the door handles at Ramekins. 


They have a beautiful facility. In addition to the culinary school, Ramekins hosts weddings and other events and is an inn. The courtyard area is gorgeous and the perfect place to wait for our class to start. 

Our class started at 3:00 pm. There were 18 students, one main chef-instructor, Linda Carucci (affiliate link), and three assistant chef-instructors. When we came in, the room was set with 18 chairs along one wall. Raised tables were pushed together in the center of the room, with 18 cutting boards set on them. There was a large mirror over the demonstration workspace, and cameras over the stovetop connected to monitors. 


I sat dead-center, but all of the seats had a good view of everything. After introductions, Linda did some demonstrations, including how to make focaccia. Not only could we watch directly and via the mirror, but the assistants brought everything around for a closer look.


They also passed around flours and doughs so we could feel the textures, and a commercial version of something we'd be making so we could taste it.

After the demonstrations were over, we each took a spot at one of the cutting boards. At our first station, Steve and I made ring-shaped taralli, which would become a crispy snack after they were boiled and baked.   


This is what they looked like after boiling and before baking.


At our second station, we made panzerotti, which are fried triangular pockets of pizza dough with mozzarella and tomato sauce inside. Think calzone, but smaller and deep-fried. 


At our final station, we made two pasta shapes: cavatelli ("little hollows") and orecchiette ("little ears"). It was a lot of fun.


Finally, when everything was done, we dropped the work tables down and rearranged them to make a large banquet table. Soon, the wine was flowing and we got to enjoy everything we'd cooked.


Everything was absolutely delicious. 


We had such a great time at Ramekins! If you're local (or will be visiting the Sonoma area), I'd definitely recommend looking into a taking a class there. Thanks to my inlaws for the chance to do this! I have a feeling we'll be back.