I've been designing our family's Christmas cards for awhile now. I love the freedom to perfectly coordinate colors and choose exactly the sentiments and fonts I want. PicMonkey (affiliate link) makes it so easy. This is our 2019 card.
I will be taking a short break from blogging while our family celebrates Christmas. I'll be back on January 1. Happy Holidays!
12/20/19
Christmas Card 2019
 Cindy deRosier has a masters in Education and taught 4th and 5th grade for 11 years. She uses that experience to blog about crafts and family-friendly educational travel. She spent many years as the Editor of Fun Family Crafts, a website with over 12,000 kid-friendly craft tutorials. Cindy is the co-author of "What Would Jesus Patent?", does freelance writing and designing, loves jigsaw puzzles, is an avid scrapbooker, and has been to all 50 states.
12/19/19
The Best of 2019
Each December, I look back on the projects I made that year and pick my favorites. Here's the best of 2019. First up, my top ten kids crafts.


I'm really pleased with the diversity of my kids crafts this year. They're made with a wide variety of materials, using many different techniques. The subject matter is varied, too.


I'm really pleased with the diversity of my kids crafts this year. They're made with a wide variety of materials, using many different techniques. The subject matter is varied, too.
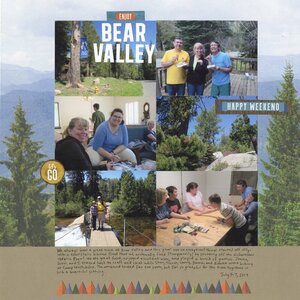
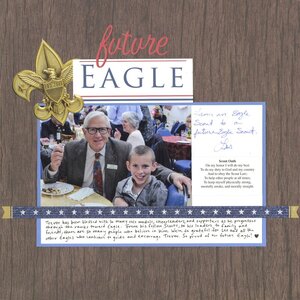
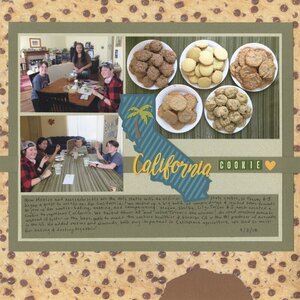
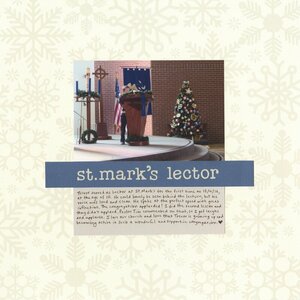
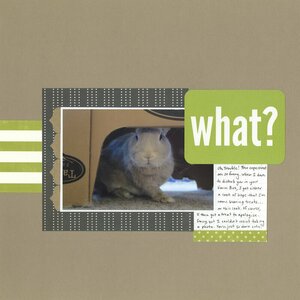
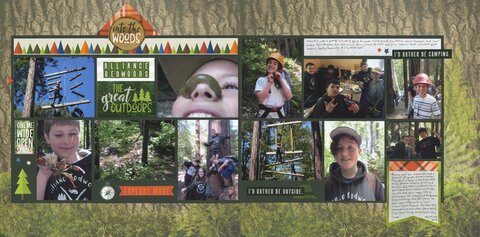
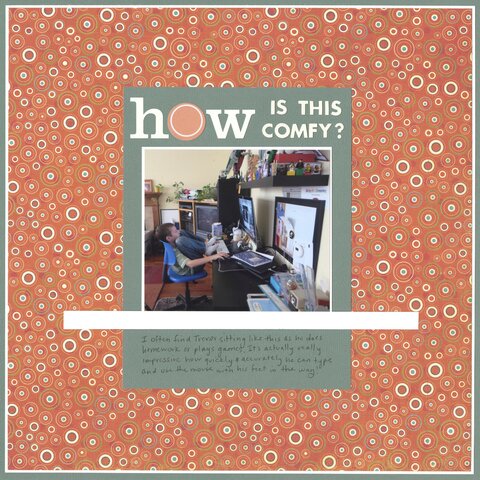
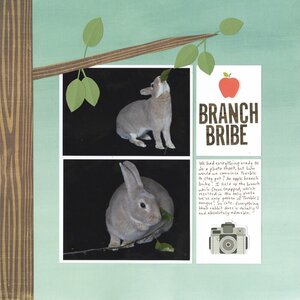
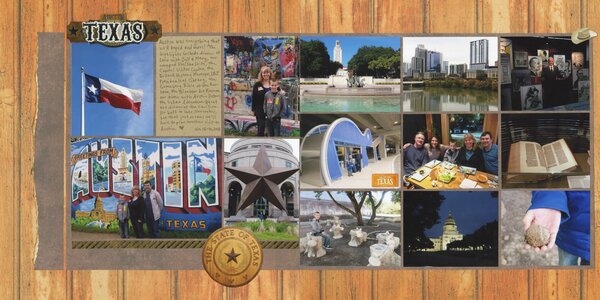
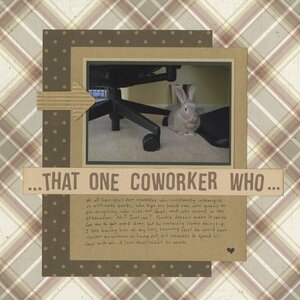
Next up, my favorite layouts from 2019. There's not nearly as much variety as with the kids crafts. Basically, it's 3T's (Trevor, Trouble, and Travel) and a whole lot of grids!


So many great memories! I'm really looking forward to creating, and then documenting, more memories in 2020.
 Cindy deRosier has a masters in Education and taught 4th and 5th grade for 11 years. She uses that experience to blog about crafts and family-friendly educational travel. She spent many years as the Editor of Fun Family Crafts, a website with over 12,000 kid-friendly craft tutorials. Cindy is the co-author of "What Would Jesus Patent?", does freelance writing and designing, loves jigsaw puzzles, is an avid scrapbooker, and has been to all 50 states.
12/18/19
Yarn and Pony Bead Christmas Tree Ornament
I had so much fun making this festive Christmas tree ornament! It's really easy to do and, other than the paint drying time, it comes together really quickly. Affiliate links below.
Yarn and Pony Bead Christmas Tree Ornament
Materials:
- 6" craft sticks (2)
- 4.5" craft stick
- 2.5" craft stick
- Folk Art paint (green, brown)
- Supertite
- 16 feet of green yarn
- pony beads
- ornament hook
Steps:
Paint the three largest craft sticks green. Paint the mini craft stick half green and half brown. When the paint is dry, glue the large sticks together to make a tree shape.

Then glue the small stick to the bottom of the tree so that the brown part becomes the trunk.
Cut a 16 foot length of green yarn and thread pony beads onto one end. I used 28 beads, but you can add more or fewer if you want a different density of 'ornaments' on your finished tree. You can do the same with the yarn. If you want your tree more or less filled in, adjust the length of the yarn.
Take the yarn end that does not have the beads near it and tie it tightly around the green portion of the tree trunk. Now wind the yarn around and over the tree until it is mostly filled in and you've reached the string of beads.
Slide one bead down the yarn so that it rests on the tree. As you continue wrapping, slide beads down one at a time. You may need to unwrap and rewrap the yarn a few times to get an arrangement you like.
Tie the yarn end around the trunk of the tree, with the knot on the back side. Weave the yarn tail into the ornament. Add a hook for hanging, or nestle it between branches on the tree.
I love my new ornament!
Labels:
Christmas,
Christmas tree,
craft stick,
Crafts for Kids,
ornament,
pony beads,
yarn
 Cindy deRosier has a masters in Education and taught 4th and 5th grade for 11 years. She uses that experience to blog about crafts and family-friendly educational travel. She spent many years as the Editor of Fun Family Crafts, a website with over 12,000 kid-friendly craft tutorials. Cindy is the co-author of "What Would Jesus Patent?", does freelance writing and designing, loves jigsaw puzzles, is an avid scrapbooker, and has been to all 50 states.
12/17/19
NYE Together
Last year, my parents got Steve a pasta attachment for Christmas. He tried it out a week later at our New Year's Eve party, successfully making two different kinds of delicious fresh pasta. Other than the pasta, our NYE was pretty much the same as it always is: great friends, lots of board games, and watching the ball drop at midnight. It's my favorite way to ring in the New Year.
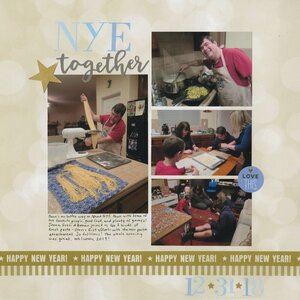
We won't be hosting NYE this year. In fact, our NYE is going to be as different from our usual routine as possible. It'll be just the three of us, at a place we've never been, with nobody that we know, yet plenty of people around us. (No, definitely not Times Square. You couldn't pay me to deal with that kind of crowds. There will be a lot fewer people around us that than, and I'm guessing many of them will be quite a bit shorter than me.) I've been working on our outfits, which feature some new-to-me Plaid products (affiliate link). Any guesses where we'll be? I don't think any of you will guess in a million years and I'm not telling until after the big night!
 Cindy deRosier has a masters in Education and taught 4th and 5th grade for 11 years. She uses that experience to blog about crafts and family-friendly educational travel. She spent many years as the Editor of Fun Family Crafts, a website with over 12,000 kid-friendly craft tutorials. Cindy is the co-author of "What Would Jesus Patent?", does freelance writing and designing, loves jigsaw puzzles, is an avid scrapbooker, and has been to all 50 states.
12/16/19
The Ultimate Christmas Recycling Craft
Steve thinks I have a problem. Specifically, he thinks that I "hoard trash." Clearly, he doesn't understand how important it is for a kids' craft blogger to have a large stash of cardboard tubes, corks, plastic lids, and empty Tic-Tac containers available for craft emergencies. Obviously, I don't have a problem. I have a perfectly normal collection of valuable crafting materials.
Yet, for someone who accuses me of "hoarding trash," Steve is my biggest enabler. He changed a burned-out light bulb the other day and asked me if I wanted it. Of course I did. Because otherwise, I couldn't have made this:
Yet, for someone who accuses me of "hoarding trash," Steve is my biggest enabler. He changed a burned-out light bulb the other day and asked me if I wanted it. Of course I did. Because otherwise, I couldn't have made this:
I'm assuming you spotted the light bulb right away, but can you find any other "trash" in there? Look closely! Did you spot an empty spool? A plastic lid? A Tic-Tac container? I used all of those and more in this project that I'm calling The Ultimate Christmas Recycling Craft. "Hoarding trash." To that I say, "Hogwash!" And anyway, I'm USING the trash important craft stash, not hoarding it.
To make my creation, I painted the light bulb with Classic Green Folk Art acrylic paint (affiliate link here and elsewhere). It took two coats to get good coverage. I added a coat of brown to the empty spool. When those were dry, I added self-adhesive enamel dots to the tree and glued a craft foam star in place. Then I attached the spool to the light bulb using Supertite. I'm a relatively new convert to Supertite. It has the holding power of hot glue, but is repositionable for much longer than hot glue and obviously doesn't have a cord or heating time. I always get it on my fingers though, so I probably should be using my Hot Glue Finger Caps with it, now that I think about it....
Anyway, here's a look at my workspace midway through the project. As you can see, my next step is gluing a scrap of felt to a plastic lid. It BARELY fit, but the whole point of my project was to use up stuff, not cut a new piece.
Once I had my tree skirt, I glued the tree in place. I decorated the presents by wrapping ribbon scraps around them. Finally, I glued them under the tree.
Clearly, I use recyclable materials cleverly, not "hoard trash." I challenge each of you to make your own version of The Ultimate Christmas Recycling Craft. It's a lot of fun!
Labels:
Christmas,
Christmas tree,
Crafts for Kids,
felt,
lid,
light bulb,
paint,
Plaid,
recycle,
ribbon,
spool,
Supertite
 Cindy deRosier has a masters in Education and taught 4th and 5th grade for 11 years. She uses that experience to blog about crafts and family-friendly educational travel. She spent many years as the Editor of Fun Family Crafts, a website with over 12,000 kid-friendly craft tutorials. Cindy is the co-author of "What Would Jesus Patent?", does freelance writing and designing, loves jigsaw puzzles, is an avid scrapbooker, and has been to all 50 states.
12/13/19
Hand-Carved Candles
When I was a kid, I was absolutely obsessed with hand-carved candles. I remember the shop on San Francisco's Pier 39 and the fascination I had with watching the talented artist create the gorgeous candles before my very eyes. I was eventually gifted my own beautiful pink and white candle, then another one later in shades of blue.
But as much as I loved watching the candles being made, I really REALLY wanted to try it myself. In the late-90's, my parents got me the Candle Magic Holiday Cut and Carve Candle Kit (sadly, no longer available anywhere that I was able to find, though here's an affiliate link to some other candle kits the same company made still for sale). My kit included everything I needed to make two carved candles. I made one and had a blast. It wasn't exactly stunning, but it was so much fun to do and I was thrilled to finally try a craft I'd wanted to do for years. I put the second set of candle materials away, saving it for a special occasion.
Well, as often happens when I save art supplies for a special occasion, my candle kit sat for years. I hadn't forgotten about it; in fact, I'd thought about making my next candle many times. I finally did and it was just as fun as the first time.
You start by softening the wax in warm water for 20+ minutes. Then you suspend the candle (that's Steve's tripod I'm using) and start carving with a paring knife.
I took a few photos as I worked, which turned out to be a dumb idea. I should have carved as quickly as possible. The wax cooled rapidly in our chilly house, but I didn't notice until one of the last pieces I carved snapped right off. Oops.
My finished candle is very uneven and clearly the work of a beginner, but I'm still happy with it. Process, not product... right?
There are lots of happy memories in my lop-sided candle, and it burns just as bright as a perfect one would. Actually, it burns much brighter, because I could never bring myself to burn such gorgeous works of art!
 Cindy deRosier has a masters in Education and taught 4th and 5th grade for 11 years. She uses that experience to blog about crafts and family-friendly educational travel. She spent many years as the Editor of Fun Family Crafts, a website with over 12,000 kid-friendly craft tutorials. Cindy is the co-author of "What Would Jesus Patent?", does freelance writing and designing, loves jigsaw puzzles, is an avid scrapbooker, and has been to all 50 states.
12/12/19
Holiday Found Poem
Have you ever created a Found Poem? You take printed material, like a newspaper or magazine article, cut out words ransom-style, arrange them to form a poem, and use a glue stick to attach them to plain paper. Back in my teaching days, we got newspapers in the classroom once a week and I'd occasionally assign a Found Poem. I loved seeing the poems my students would create. Even though they were using the same newspaper, their poems were always completely different.
Our local newspaper ran a story about the Christmas at the Waterfront event, with photos from the Lighted Boat Parade. Our family loves attending and seeing the creative ways that people light up their boats. I thought it would be a fun challenge to make a Found Poem about our family traditions. I cut out the photos and a bunch of random words from the headlines in that day's paper, but as I arranged and rearranged them, my poem went a different direction.
Most of the words in my poem came from headlines that have absolutely nothing to do with Christmas. That's half the fun and it really challenges your creativity. If you've never done a Found Poem, I encourage you to give it a try!
Our local newspaper ran a story about the Christmas at the Waterfront event, with photos from the Lighted Boat Parade. Our family loves attending and seeing the creative ways that people light up their boats. I thought it would be a fun challenge to make a Found Poem about our family traditions. I cut out the photos and a bunch of random words from the headlines in that day's paper, but as I arranged and rearranged them, my poem went a different direction.
Christmas Memories
Preserve family tradition:
songs, treats, and making wreaths.
More important:
Including Christ this season.
Most of the words in my poem came from headlines that have absolutely nothing to do with Christmas. That's half the fun and it really challenges your creativity. If you've never done a Found Poem, I encourage you to give it a try!
Labels:
Christmas,
Crafts for Kids,
newspaper,
poetry
 Cindy deRosier has a masters in Education and taught 4th and 5th grade for 11 years. She uses that experience to blog about crafts and family-friendly educational travel. She spent many years as the Editor of Fun Family Crafts, a website with over 12,000 kid-friendly craft tutorials. Cindy is the co-author of "What Would Jesus Patent?", does freelance writing and designing, loves jigsaw puzzles, is an avid scrapbooker, and has been to all 50 states.
12/11/19
Plaid's Let's Paint Live - Handmade Holiday Ornaments (Cindy's Version)
I had a blast with this month's "Let's Paint Live" with Plaid! This time, the project was Handmade Holiday Ornaments. Check out what I made:
Instructor Jessie Pniewski's ornaments look like this:


Instructor Jessie Pniewski's ornaments look like this:
Astute readers may notice that my projects look a bit different than Jessie's. Perhaps the biggest difference is that I used cork coasters as my substrate rather than wood rounds. (Affiliate links here and throughout the post). I've never painted on cork and was curious to see how it would work. Once I decided to go off-script and use Jessie's instruction as guidance and not gospel, I made a few other modifications.


The trees are more sparsely decorated and I painted the blue background all the way to the edge. (I also put a base coat of white gesso on that coaster, but it turns out that I didn't need to. I didn't use gesso for the other two coasters and there's no obvious difference in coverage.) The buffalo plaid didn't work all that well on the cork, and I changed the deer into a mouse with a sprig of holly on one ear. The wreath got a lot bushier and gained a bow.
But the most interesting experiment was with the rub-on. I was really curious to see how it would adhere to cork. There were a few tiny cracks, but they're barely noticeable:
I'm trying to decide how best to seal these so I can use them as coasters. My gut is saying Mod Podge Ultra, but I'm not sure what it will do to the rub-on. Only one way to find out, right?!
Anyway, thanks to Plaid for another super fun Let's Paint Live! The next one is coming up on Thursday, January 11 and I can't wait.
Labels:
Christmas,
Christmas tree,
cork,
Crafts for Kids,
Disney,
paint,
Plaid,
wreath
 Cindy deRosier has a masters in Education and taught 4th and 5th grade for 11 years. She uses that experience to blog about crafts and family-friendly educational travel. She spent many years as the Editor of Fun Family Crafts, a website with over 12,000 kid-friendly craft tutorials. Cindy is the co-author of "What Would Jesus Patent?", does freelance writing and designing, loves jigsaw puzzles, is an avid scrapbooker, and has been to all 50 states.
12/10/19
Quilled Poinsettia Card ... and a Winner!
I had the quilling supplies out the other day, so I whipped up a quilled poinsettia card. It's a really easy beginner project with only three shapes you need to learn.
If you've never done quilling before, you need to know that when it comes to quilling there is an easy way and there is a thrifty way. If it's just going to be yourself or a small group, spend a little money and go the easy route. If you're going to make this in a classroom or other large group, you'll probably have no choice but to go thrifty. In the materials list below, the first item is the easy option and the second item is the thrifty option. These are affiliate links.
Quilled Poinsettia Card
Materials:
- cardstock OR construction paper
- quilling paper OR colored copy paper
- quilling tool OR round toothpick
- precision tip glue OR white glue
- reverse tweezers OR normal tweezers
Steps:
Start by cutting red cardstock or construction paper into the size of card you want. Cut a piece of white cardstock or construction paper that is slightly smaller in both directions.
If you have quilling paper, you're ready to go. Otherwise, you need to use a paper trimmer to cut the copy paper into long, narrow strips. I like 3 mm. strips, but you can do 5 mm. or other sizes. Warning: this is tedious if you're making enough for a class of 32+ students. Make plenty of extras and do your best to make sure the strips are uniform.
Use the quilling tool or the toothpick to make the following shapes: 6 green teardrops, 8 red teardrops, 1 yellow loose circle, and 7 yellow tight circles.
Glue the loose circle to the center of the white paper. Arrange the green teardrops around the circle with the points facing out. Lift them one by one and glue them in place. (This is much easier to do with reverse tweezers and precision-tip glue. Otherwise, use a toothpick to apply glue to the shape as you hold it with ordinary tweezers or your fingers.) Arrange the tight circles close to one another on top of the loose circle. Glue them in place. Place the red teardrops around the yellow center, then glue them down.
Adhere the white paper to the red card blank.
---------
Time to announce the winner of the Orange Art Box giveaway! Congrats to:
Barbara, please send your mailing address to cindy.mycreativelife at gmail.com and the December Orange Art Box will be on its way!
Labels:
Christmas,
Crafts for Kids,
flower,
poinsettia,
Quilling
 Cindy deRosier has a masters in Education and taught 4th and 5th grade for 11 years. She uses that experience to blog about crafts and family-friendly educational travel. She spent many years as the Editor of Fun Family Crafts, a website with over 12,000 kid-friendly craft tutorials. Cindy is the co-author of "What Would Jesus Patent?", does freelance writing and designing, loves jigsaw puzzles, is an avid scrapbooker, and has been to all 50 states.
12/9/19
Pet Memorial Heart Box
Several friends have lost beloved pets recently. I designed this memorial heart box to hold a furry family member's ID tags, collar, or other memorabilia after they've passed. Affiliate links below.
Pet Memorial Heart Box
Materials:
- Plaid wood heart box
- 1.5" wood hearts
- Plaid Medium Gray acrylic paint
- fine grit sandpaper
- floral wire
- pink felt
- Supertite glue
Steps:
Paint the wood box and two wood hearts Medium Gray. When the paint is dry, use a fine grit sandpaper (I used 400) to smooth down any lifted grain. Apply a second coat of paint. Paint the inside of the box using the same technique.
Glue the wood hearts to the box to make the ears.
Cut three pieces of floral wire, approximately 5.5" each. Glue them to the base of the heart, with them splayed out to look like whiskers.
Cut out two inner ears and a nose from pink felt. Glue them in place. Line the inside bottom of the box with felt as well.
Add a photo to the box if desired, then fill with mementos.
 Cindy deRosier has a masters in Education and taught 4th and 5th grade for 11 years. She uses that experience to blog about crafts and family-friendly educational travel. She spent many years as the Editor of Fun Family Crafts, a website with over 12,000 kid-friendly craft tutorials. Cindy is the co-author of "What Would Jesus Patent?", does freelance writing and designing, loves jigsaw puzzles, is an avid scrapbooker, and has been to all 50 states.
12/6/19
What to Pack and How to Prepare for the AFCI Creativation Show
The Creativation Show, put on by the Association for Creative Industries (AFCI), opens in Phoenix in 40 days and I can't wait! Creativation is an amazing 5-day event that takes place each January. It brings together manufacturers, buyers, designers, and everyone else in the craft industry for sales, education, and networking. (Sorry consumers - this is just for industry professionals.)
This will be my 7th time attending Creativation. Each time has been more valuable than the last as I've improved the focus of my business, taken risks, and built deeper connections within the industry. Exciting things happen at this show.
I wrote a post about preparing for the show back in 2015 when it was called the Craft and Hobby Association (CHA) Mega Show, added a few more tips in 2016, then did another update before the January 2019 show. Now I'm bringing all of my advice into one post in Ask Cindy format. There are affiliate links in the post.
Snacks? Can't I just get food there?
How's the wifi at the Convention Center?
I'm flying to and from Phoenix. What should I know?
What else should I know?
I wrote a post about preparing for the show back in 2015 when it was called the Craft and Hobby Association (CHA) Mega Show, added a few more tips in 2016, then did another update before the January 2019 show. Now I'm bringing all of my advice into one post in Ask Cindy format. There are affiliate links in the post.
What should I wear to Creativation?
Think comfortable business casual. In past years, it's been chilly at the Convention Center, but in 2019 it was warm. Wear layers. My show 'uniform' is a colorful blouse with a modest neckline, a light sweater, interesting jewelry, dark jeans, and super comfy black tennis shoes or boots.
Jeans and tennis shoes?!
Dark jeans and clean tennis shoes, but yes. I'm a big believer in 'dressy on the top, comfy on the bottom'. Expect to walk at least 5 miles and up to 10 miles on a typical show day. Comfortable shoes are not an option; they are a must. I like jeans because they have plenty of pockets and are great for movement. Expect to frequently stoop and bend to look at products and perch on stools to do make-and-takes. Check out this post for pictures of me and others at the 2019 show.
Do I need business cards?
Yes. Absolutely. If you don't have some already, order them right now.
How many cards do I need?
I typically go through 100+ at a show. Do not be shy about exchanging business cards. I like to jot a note on the back of mine to remind the person where/how they met me. I do the same with cards I receive. And don't forget to reach out to everyone you met after the show! Follow their blog, check out their store, send thanks, email especially good photos you took of them, or simply say hi!
What else do I need at the show?
You'll get a tote when you register, but I strongly recommend a small rolling bag for the trade show floor. You'll potentially receive a lot of samples and do multiple make-and-takes and your shoulders will thank you. My rolling bag is just wide enough for 12" x 12" paper, with plenty of pockets for snacks, a water bottle, Advil, Kleenex, business cards, ziplock bags (handy for protecting make-and-takes) and everything else I need. I also keep a 12" x 12" plastic envelope with a piece of 12" x 12" chipboard inside so that any paper samples or layout and card make-and-takes aren't ruined.
Snacks? Can't I just get food there?
Yes... maybe. There's a food court and concessions areas at the Phoenix Convention Center, as well as plenty of food options nearby, but they aren't all open all the time and the lines can get long. You may not have time to get a proper meal, particularly on the education days. I always carry nuts, dried fruit, and granola bars. I also carry hand sanitizer to use before I eat.
Don't forget to hydrate. The climate in Phoenix is dry. Bring a refillable bottle (this one is awesome and perfect if you're flying); there are water stations outside the classrooms and drinking fountains at the restrooms. I recommend chapstick and lotion, too.
How's the wifi at the Convention Center?
Lousy.
I'm flying to and from Phoenix. What should I know?
You will return home with more than you are bringing, probably a lot more. When flying to Phoenix, check one large suitcase with a smaller suitcase inside. On the way home, check both.
Use the Metro to get from the airport to the Convention Center and/or your hotel. It's only $2 and is super easy, safe, and convenient. When you leave baggage claim, follow the sign to the Sky Train. Then buy a Metro ticket on Level 2 at the kiosk. Get on the westbound train. Get off at the Washington/3rd Station, about a 15 minute trip. It puts you on the south side of the Convention Center, an easy walk to the nearby hotels.
To get back to the airport after the show, use SuperShuttle. It costs around $12. When I'm loaded down with an extra 50+ pounds of samples, make-and-takes, literature, and more, I can't deal with my luggage on public transportation. It's worth the extra $10 + tip to not have to manage that luggage on my own.
Know the prohibitions about flying with craft-related banned items before accepting samples. If you fly with certain craft materials, even in your checked luggage, TSA will confiscate your items and mail you a Nastygram. (Ask how I know!)
What's the area around the Convention Center like?
It's great! Clean, safe, and easy to navigate. I've seen a few homeless people nearby over the years, but none have been aggressive. I've felt safe walking alone, but if you don't, Phoenix has an awesome Ambassador program. You'll see people in orange "Ask me!" shirts who are there specifically to help with whatever you need. They'll walk you to your hotel, give you directions, recommend restaurants, help you buy a metro ticket, or anything else you need. Stop and talk with them!
Phoenix is a GREAT city. There is so much to do around the Convention Center. Read all about my favorite things to do and places to eat in Phoenix.
Download the show app.
Know what your priorities are for the show and plan accordingly. Make appointments with people you need to see, create route maps to hit your most crucial booths, and conduct business the first time you have the chance. Take as many classes as possible.
Take notes about absolutely everything. Don't fall into the trap of thinking that you'll remember everyone you met, everything you saw, and everything you did because you won't. Photos help. Take lots of photos.
Attend the Annual Business Meeting and Town Hall. AFCI is a trade organization. It is in your best interest be informed about what is going on in the organization. Attend meetings. Ask questions. Learn more.
Talk to everyone.
This sounds exhausting.
Yes.
And it's SO MUCH FUN. Creativation is amazing. Being surrounded by thousands of people who share your passion is incredible. Try new things. Meet new people. Experience and enjoy it all. Say yes to opportunities and be open to possibilities.
I have more questions.
Ask me in the comments, or email me: cindy.mycreativelife at gmail.com. I'm happy to answer any questions you have!
Labels:
Ask Cindy,
Creativation
 Cindy deRosier has a masters in Education and taught 4th and 5th grade for 11 years. She uses that experience to blog about crafts and family-friendly educational travel. She spent many years as the Editor of Fun Family Crafts, a website with over 12,000 kid-friendly craft tutorials. Cindy is the co-author of "What Would Jesus Patent?", does freelance writing and designing, loves jigsaw puzzles, is an avid scrapbooker, and has been to all 50 states.
12/5/19
Pipe Cleaner Wreath Ornament
If you're not familiar with Red Ted Art, it's well-worth checking out. While I don't personally know Maggy, I've admired her kid-friendly crafts for years. Today's project is inspired by Maggy's Easy Yarn Wreath Ornament. I was curious to see what would happen if I switched out the yarn for pipe cleaners. I love the result! Affiliate links below.
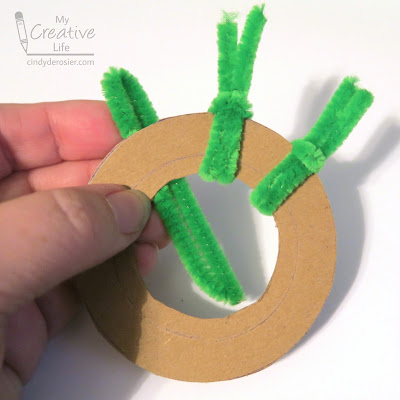
Give the pipe cleaners a trim so that all the ends are even.
Pipe Cleaner Wreath Ornament
Materials:
- chipboard
- scissors
- pipe cleaners
- wire snips (oooh, glittery!)
- mini pom poms
- Supertite glue
- monofilament cord
Steps:
Trace a 3" circle with a 2" inner circle on chipboard. Cut out the pieces to make the base of your wreath.
Snip a green pipe cleaner in half and set one piece aside. Fold the other piece in half, and hold it behind the base with the folded end pointing toward the outside of the wreath. Bend the two ends up and over the base, then thread them through the folded end. Pull tight.
Continue adding pipe cleaner halves until the whole base is covered.
Give the pipe cleaners a trim so that all the ends are even.
Bend the outer portions of the pipe cleaners to the left to mimic the way a real wreath is assembled.
Cut a length of monofilament and tie it around the wreath to make a hanger.
Take a red pipe cleaner (don't snip it in half like the green ones) and twist it to form a bow shape. Glue it to the wreath, covering the monofilament hanger. Add colorful pom poms to the wreath, including a red one in the center of the bow.
Hang your finished wreath on the tree, use it as a gift topper, or slide it down the neck of a wine (or sparkling cider) bottle for a fabulous hostess gift!
Labels:
chenille stem,
Christmas,
Crafts for Kids,
ornament,
pipe cleaner,
pom pom,
wreath
 Cindy deRosier has a masters in Education and taught 4th and 5th grade for 11 years. She uses that experience to blog about crafts and family-friendly educational travel. She spent many years as the Editor of Fun Family Crafts, a website with over 12,000 kid-friendly craft tutorials. Cindy is the co-author of "What Would Jesus Patent?", does freelance writing and designing, loves jigsaw puzzles, is an avid scrapbooker, and has been to all 50 states.
Subscribe to:
Posts (Atom)


