9/30/22
Scarecrow Mason Jar
 Cindy deRosier has a masters in Education and taught 4th and 5th grade for 11 years. She uses that experience to blog about crafts and family-friendly educational travel. She spent many years as the Editor of Fun Family Crafts, a website with over 12,000 kid-friendly craft tutorials. Cindy is the co-author of "What Would Jesus Patent?", does freelance writing and designing, loves jigsaw puzzles, is an avid scrapbooker, and has been to all 50 states.
9/29/22
Cinnamon Spice Caramel Apple Popcorn with Felt Apple Tag
Cinnamon Spice Caramel Apple Popcorn
Ingredients:
- Bare Dried Apples - Fuji and Reds (1/2 cup)
- brown sugar (2 T)
- cinnamon (1 tsp)
- nutmeg (dash)
- buttered popcorn (10 cups)
- Wilton Salted Caramel Candy Melts (2 oz.)
Steps:
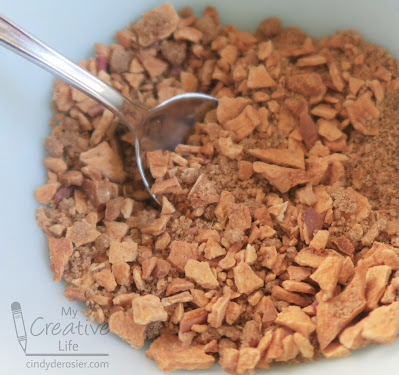
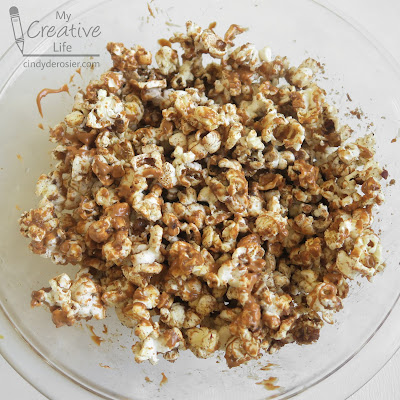
Felt Apple Tag
Materials:
Steps:
 Cindy deRosier has a masters in Education and taught 4th and 5th grade for 11 years. She uses that experience to blog about crafts and family-friendly educational travel. She spent many years as the Editor of Fun Family Crafts, a website with over 12,000 kid-friendly craft tutorials. Cindy is the co-author of "What Would Jesus Patent?", does freelance writing and designing, loves jigsaw puzzles, is an avid scrapbooker, and has been to all 50 states.
9/28/22
Ellia at 12
 Cindy deRosier has a masters in Education and taught 4th and 5th grade for 11 years. She uses that experience to blog about crafts and family-friendly educational travel. She spent many years as the Editor of Fun Family Crafts, a website with over 12,000 kid-friendly craft tutorials. Cindy is the co-author of "What Would Jesus Patent?", does freelance writing and designing, loves jigsaw puzzles, is an avid scrapbooker, and has been to all 50 states.
9/27/22
Andrei at 15
 Cindy deRosier has a masters in Education and taught 4th and 5th grade for 11 years. She uses that experience to blog about crafts and family-friendly educational travel. She spent many years as the Editor of Fun Family Crafts, a website with over 12,000 kid-friendly craft tutorials. Cindy is the co-author of "What Would Jesus Patent?", does freelance writing and designing, loves jigsaw puzzles, is an avid scrapbooker, and has been to all 50 states.
9/26/22
Colorful Me, Inspired by Andy Warhol
 Cindy deRosier has a masters in Education and taught 4th and 5th grade for 11 years. She uses that experience to blog about crafts and family-friendly educational travel. She spent many years as the Editor of Fun Family Crafts, a website with over 12,000 kid-friendly craft tutorials. Cindy is the co-author of "What Would Jesus Patent?", does freelance writing and designing, loves jigsaw puzzles, is an avid scrapbooker, and has been to all 50 states.
9/23/22
50 State Album: Minnesota (#41) and Wisconsin (#42)
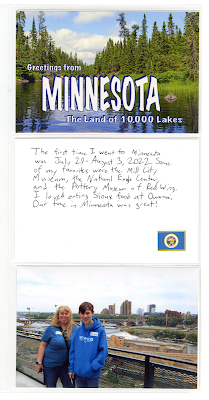
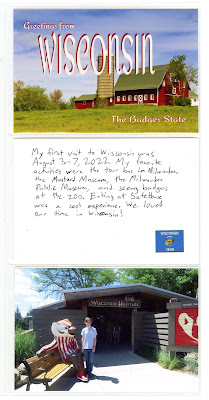
 Cindy deRosier has a masters in Education and taught 4th and 5th grade for 11 years. She uses that experience to blog about crafts and family-friendly educational travel. She spent many years as the Editor of Fun Family Crafts, a website with over 12,000 kid-friendly craft tutorials. Cindy is the co-author of "What Would Jesus Patent?", does freelance writing and designing, loves jigsaw puzzles, is an avid scrapbooker, and has been to all 50 states.
9/22/22
Trouble Hiding
 Cindy deRosier has a masters in Education and taught 4th and 5th grade for 11 years. She uses that experience to blog about crafts and family-friendly educational travel. She spent many years as the Editor of Fun Family Crafts, a website with over 12,000 kid-friendly craft tutorials. Cindy is the co-author of "What Would Jesus Patent?", does freelance writing and designing, loves jigsaw puzzles, is an avid scrapbooker, and has been to all 50 states.
9/21/22
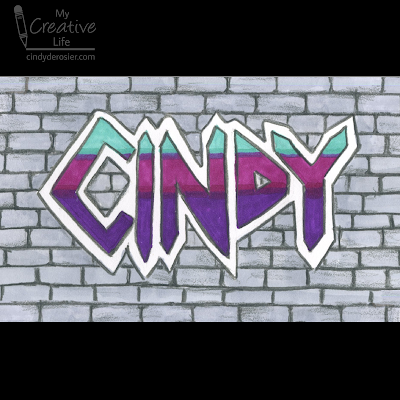
Graffiti Name Art
 Cindy deRosier has a masters in Education and taught 4th and 5th grade for 11 years. She uses that experience to blog about crafts and family-friendly educational travel. She spent many years as the Editor of Fun Family Crafts, a website with over 12,000 kid-friendly craft tutorials. Cindy is the co-author of "What Would Jesus Patent?", does freelance writing and designing, loves jigsaw puzzles, is an avid scrapbooker, and has been to all 50 states.
9/20/22
Documenting our US Travel (and How to Make a GIF)
 Cindy deRosier has a masters in Education and taught 4th and 5th grade for 11 years. She uses that experience to blog about crafts and family-friendly educational travel. She spent many years as the Editor of Fun Family Crafts, a website with over 12,000 kid-friendly craft tutorials. Cindy is the co-author of "What Would Jesus Patent?", does freelance writing and designing, loves jigsaw puzzles, is an avid scrapbooker, and has been to all 50 states.
9/19/22
In the Style of El Greco, from "Discovering Great Artists"
The authors have divided the many projects into four categories: Long, Long Ago (Renaissance and Post-Renaissance); Sunny and Free (Impressionists and Postimpressionists); Wild and Wacky (Expressionists, Abstract, Abstract Expressionists, Cubists, Dadaists, and Surrealists); and Art Today, Every Way (Pop, Op, Modern, Photojournalists, and Children's Book Illustrators). There are 15-20 artists and projects they inspire in each category. Each includes handy icons to show the difficulty level, prep time, media used, and artist style. Even if you never made any of the projects, this book provides an outstanding summary of the major artists in each style.
 Cindy deRosier has a masters in Education and taught 4th and 5th grade for 11 years. She uses that experience to blog about crafts and family-friendly educational travel. She spent many years as the Editor of Fun Family Crafts, a website with over 12,000 kid-friendly craft tutorials. Cindy is the co-author of "What Would Jesus Patent?", does freelance writing and designing, loves jigsaw puzzles, is an avid scrapbooker, and has been to all 50 states.
9/16/22
Caprese Salad in a Sourdough Bread Bowl
One of my absolute favorite things about summer is eating homegrown tomatoes right off the vine, still warm from the sun, juicy, and full of flavor. We planted four varieties of tomatoes this year and I used some of each to make my take on a caprese salad, served in a mini sourdough bread bowl. It was the perfect summer meal.
 Cindy deRosier has a masters in Education and taught 4th and 5th grade for 11 years. She uses that experience to blog about crafts and family-friendly educational travel. She spent many years as the Editor of Fun Family Crafts, a website with over 12,000 kid-friendly craft tutorials. Cindy is the co-author of "What Would Jesus Patent?", does freelance writing and designing, loves jigsaw puzzles, is an avid scrapbooker, and has been to all 50 states.
9/15/22
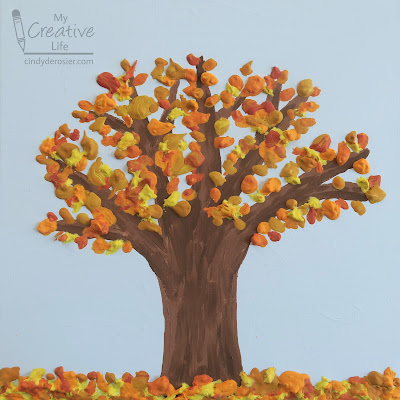
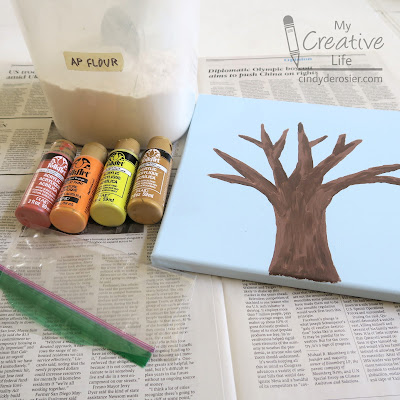
Dimensional Fall Tree (Experimenting with Piping Flour-Thickened Paint)
A large number of the crafts I make could start with the introduction, "So I had this idea and wanted to see what would happen if..." In this case, I wanted to see if I could thicken inexpensive acrylic paint with flour*, then pipe it onto a canvas as if it were frosting. It didn't quite work as I'd hoped, but I'm happy with the end result. And it was a lot of fun to make!

 Cindy deRosier has a masters in Education and taught 4th and 5th grade for 11 years. She uses that experience to blog about crafts and family-friendly educational travel. She spent many years as the Editor of Fun Family Crafts, a website with over 12,000 kid-friendly craft tutorials. Cindy is the co-author of "What Would Jesus Patent?", does freelance writing and designing, loves jigsaw puzzles, is an avid scrapbooker, and has been to all 50 states.
9/14/22
Drawing Myself as a Duolingo Character
This week, I hit a 600-day streak learning Spanish on Duolingo. To mark the occasion, I decided to draw myself as a Duolingo character. I found an image of the Duolingo characters and identified their distinctive characteristics: rounded geometric shapes, unrealistic proportions, large eyes, teardrop noses, bright colors, minimal details, and disembodied feet on a white background.
Then I used those traits to draw myself in the Duolingo style. This was my first draft.
The next category says that all Duolingo characters must be designed with a flat perspective. I'm fine there. I didn't use shadows, so that's ok too. Then we get to color. There is a recommended color palette that I didn't follow, along with suggestions to be playful and vibrant while avoiding using too many colors. The final guideline is about floating accents. I only floated the feet, so I'm fine there. As I was looking closer at the characters, I realized my eyes were wrong. So I fixed those and made a bunch of changes to the colors, bringing me to....
 Cindy deRosier has a masters in Education and taught 4th and 5th grade for 11 years. She uses that experience to blog about crafts and family-friendly educational travel. She spent many years as the Editor of Fun Family Crafts, a website with over 12,000 kid-friendly craft tutorials. Cindy is the co-author of "What Would Jesus Patent?", does freelance writing and designing, loves jigsaw puzzles, is an avid scrapbooker, and has been to all 50 states.








.png)
.png)
