11/30/22

Fun with Math Puns: Making Winter Symme-trees

My favorite puns are the really intellectual ones, where you have to have specific, often esoteric knowledge to get the joke. I'm sure that I miss many of them completely as they go over my head, but that only makes the ones I do get all the more satisfying. It's like a little reward knowing that you're educated enough (in at least one specific area) to understand an intellectual pun. 

The first time I remember really appreciating a pun was around 1st or 2nd grade, when I discovered The King Who Rained (affiliate link here and below). I laughed out loud in our silent school library, checked out the book, and laughed about it every time I thought about it. I checked that book out at least a dozen times over the rest of my elementary school career. I was also a huge fan of Amelia Bedelia. We had a Japanese exchange student and her teacher stay with us when I was 8 and they LOVED those books. Getting the joke in a language you're learning must be even more satisfying than in your native language. 

Back in my teaching days, my students loved discovering a punny book in our class library that they hadn't previously understood. Like when we would first encounter circumference in the math book... one year, a student yelled, "Hey!" and ran giggling to the class library to pull out these books, super pleased with himself to finally get the joke. That totally made my day. It's an amazing feeling to see kids not only learning, but making a strong enough connection with material to understand a pun. 

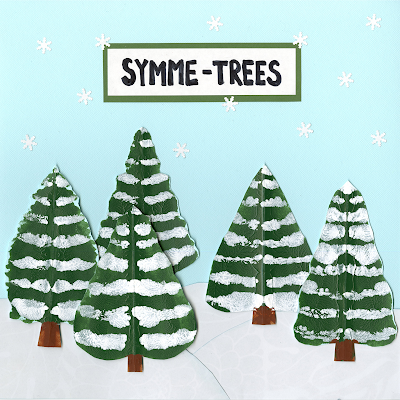
I was thinking of those kids when I made these Symme-trees. Naturally, they go perfectly with a math lesson about symmetry. Wouldn't a whole bulletin board of them look great?


Winter Symme-trees


Materials:


Steps:


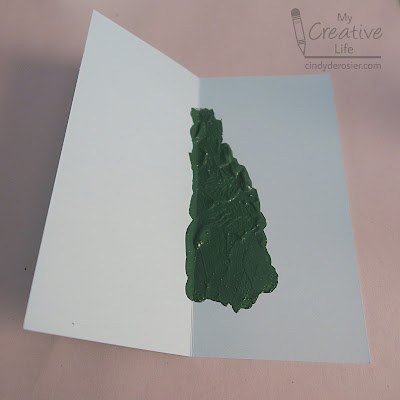
Set aside one sheet of light blue cardstock. Cut the other sheet into six pieces, each approximately 4" x 6". Use the scoring board to make a fold line down the center of each. Add green paint to the right-hand side of each piece, vaguely forming the shape of half a tree. Start with a conversative amount of paint. You can add more, but can't remove it. 


Fold the paper along the scored line, pressing the paint onto the other side. Open up the paper; if you're happy with the tree, set it aside to dry and move on to the next one. If there wasn't enough paint, just add more on the right side and press again. 

Let all six trees dry completely. When they are dry, add horizontal swaths of white paint to mimic snow. Fold and press. Again, you can add more paint in it doesn't transfer well. 


When the white paint is dry, add brown for the trunk. Let all the paint dry completely, then fold the trees the opposite direction, so that the paint is facing out. Carefully cut around each tree. 

Cut the white cardstock into snowy hills. Ink the edges with pale grey ink, then glue them to the background paper. You can glue your trees directly to the background paper too, but I used foam tape to pop them up and add extra dimension. It's hard to tell in the scanned image, but it makes a big difference in person. Finally, decorate with snowflakes. Adding a "SYMME-TREES" title is optional. 


If I were making these in the classroom, I'd follow up with challenging the students to think of tree puns to work into a story or other piece of creative writing. I would love to cedar clever ideas... fir sure!

11/29/22

Coloring with Terrible Crayons

I almost never use crayons for artwork anymore, despite having a good-sized collection of them. Last year, I pared down my giant crayon stash and got rid of all of the terrible ones. For as rarely as I use crayons and for as many Crayolas as I own, I don't need what are essentially wickless candles pretending to be art supplies.

I am more of a crafter than an artist, but I'm increasingly realizing that a person will never improve much as an artist if they keep using low-quality art supplies. That said, there are times when you're stuck with using low-quality art supplies. I was recently at an event that had coloring pages and "crayons" (sticks of wax with very little pigment) for the kids. Since there was no rule that you had to be a kid to color, I took some. (My philosophy is that since there's no reason I can't be a Junior Ranger at age 50, there shouldn't be any age-related prohibition on coloring either.) 

My box of "crayons" had six colors: red, orange, yellow, green, blue, and purple. No black, brown, or white, unfortunately. I did my best to use varying amounts of pressure to create shades and the illusion of shadows. When blending colors didn't work, I layered them after using my fingernail to scrape off the bits of wax the first layer left behind. 


It's no masterpiece. If I'd used Crayola crayons (or better yet, colored pencils) on higher quality paper, my resulting artwork would look a lot better. But it's not terrible, either. Of course, I know there are artists with a lot more skill than I have who could have made something much better with the same materials I did use. The best results come from the combination of practice and high-quality materials.

If you find your skills are not progressing despite practice, it might be time to invest in better quality stuff. You don't need to jump from all the way from restaurant freebies to professional-grade, but it might be worth getting something toward the higher end. My favorite place to get good quality art supplies is Blick. Everything they sell is decent, and you can find good options no matter what your price point is. 

11/28/22

Result = Skill + Tools

Owning every fancy cake decorating tool does not mean that someone who has never decorated a cake can make a masterpiece. Far from it. You can have all the best tools, but skill is crucial. Someone with skill can decorate a cake beautifully using nothing but a knife. Will that cake be as nice as if the expert had used high-quality, specialty equipment? Nope, but it will probably look better than the novice who uses the best supplies that exist.


Skill matters, and so do the tools. Without one or the other, the results are not going to be as good as if you had both. To continue the example of the cake decorator, not only do the tools matter, but the frosting does too. If it's too runny or too thick, grainy, or separated, the cake will suffer no matter what tools you have. 

So does this mean beginners should buy the all best tools and materials from the start? Yes and no. A cake decorating novice doesn't need 50 decorating tips, multiple shapes of cake combs, icing bag stands, an airbrushing kit, and special cutters for fondant and gum paste; you start with a few basics. But make sure that what you buy is a decent quality, or you'll be struggling unnecessarily and rebuying nicer ones later. (By the way, I've included affiliate links here, in case all this cake talk is motivating you to try decorating.)  

As you gain skill, you are better able to determine what supplies you need to get the results you want. That's the time to add more items to your collection. That said, there's nothing wrong with getting a particular tool or supply that interests you. If you can afford it and know that you'll use it (or can give it to someone who will), then go for it. 

I used cake decorating as an example for today's post, but it applies to all sorts of creative endeavors. Watercolor paint from a dollar store is not going to perform as well as artist-grade paint will, no matter who is using it. An expert painter can probably create a decent painting with it, but not nearly as nice as they could with the best watercolor paint. And a beginner using low-quality watercolors may be frustrated by their inability to do a certain technique that would be much easier to do with the pricier paint. 

Result = Skill + Tools. 

This Week's Coupon at Michaels.com

11/25/22

Sketchbook Party: Angie Chua, Ohn Mar Win, Helen Colebrook, and Peggy Dean

This is the last of five posts about Sketchbook Party. If you haven't already, I recommend reading the first, second, third, and fourth posts before you read this one. 

---------

Travelers notebooks (abbreviated TN) are very popular in the scrapbook community. It turns out they're equally popular amongst artists who work in sketchbooks, although they call them travel sketchbooks. They're the same thing, and a fun topic for this class, titled "Travel Journaling for Everyone." 


I used to collect a lot of memorabilia when I traveled, then ended up using very little of it (if any) on my scrapbook pages. So now I collect as little as possible. I turn down brochures if I don't need them to navigate in a museum, I don't bring printed napkins home to do something with the logo, and I don't take the free stickers or business cards or other bits and pieces that are all over the place if you're looking for them. 

While this is good practice ecologically, it is poor practice for a class about travel sketchbooks. I gathered the four items I'd collected from our time in Milwaukee, as well as the hotel logo from our printed reservation, and put them together to make this page. The bottom left has my admission ticket from Harley-Davidson. The top right has part of the Recon Duty we did at SafeHouse (SO FUN!), the bottom right has a logo cut from the amazing Milwaukee Public Museum, and the center has a sticker from the National Bobblehead Hall of Fame. I added letter stickers, striped washi, and used two colors of Flair markers to decorate. 


While my finished product is not particularly attractive or coordinated, I like the balance and had a lot of fun putting it together. There are a number of reasons why travelers notebooks / travel sketchbooks don't work for my style of memory keeping, but gosh are they fun!

---------

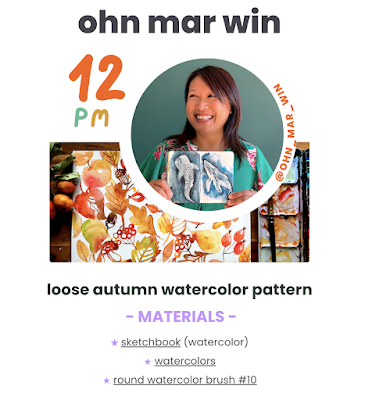
Next up was "Loose Autumn Watercolor Pattern." 


Ohn Mar Win led us through a relaxing and fun session painting watercolors with what I considered to be an enormous brush. She had us intentionally paint each shape quickly, touching at least one other shape in order to have the colors bleed together.  


My artwork tends to be clean and controlled. I like crisp edges and uniformity and details. This project was the exact opposite in every way... and I loved making it! It's completely different from what I normally do, which was fun. That said, I feel like the project isn't finished. I'd like to go back in with colored pencils and add shading and details. 

---------

The next class was "Relaxing and Beautiful Way to Fill a Blank Page." The supply list said watercolors, but I'd just done a watercolor class and decided to use Folk Art acrylic paints instead. 


It was a good decision. My paint dried in time to add the flair pen details, while others who used watercolors still had wet paint when Helen Colebrook was demonstrating the final step. 


I loved making this project; it's definitely something I'll do again. I played with a color palette I wouldn't normally pick and overall it was just a lot of fun to do. 


---------

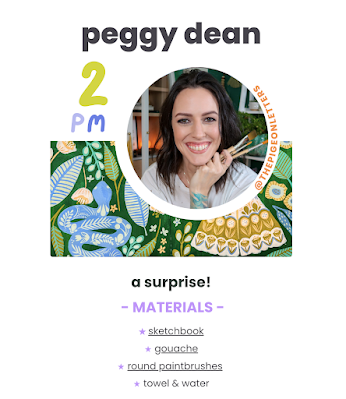
The final class of Sketchbook Party was by the hostess, Peggy Dean. She titled it, "A Surprise!" 


We ended up making a patterned moth. She used gouache, which I don't own. It's on my Christmas wish list, so hopefully I can play with some soon! Instead, I used acrylic paint again. 


My heart wasn't really in this project. It was fine, but not something I would necessarily do again. Although I am interested to see how it would work in gouache. 

---------

So what did I think of Sketchbook Party overall? It was fantastic! It's unbelievable that I only paid $29 for 16 art classes. I liked some classes more than others, of course, but even the classes I liked less than others were interesting and informative. I am now following several artists that I hadn't heard of before the event, and I'm eager to dive deeper into some of the new techniques I learned. If Sketchbook Party happens again, I'll definitely be joining in!

CLICK.BUY. CREATE. Shop Michaels.com today!

11/24/22

Sketchbook Party: Savina Monet, Merel Djamila, and Erika Lamar Buentello

This is the fourth of five posts about Sketchbook Party. If you haven't already, I recommend reading the first, second, and third posts before you read this one. 

---------

The tenth class during Sketchbook Party was "The Analog Collage Crash Course."  


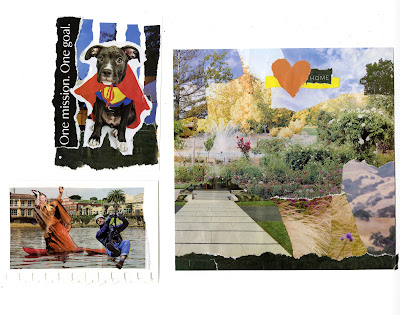
Savina Monet explained her process for making collages on index cards from magazines and book pages. I've never done collage that small, so I was excited to give it a try. I used the October issue of Diablo Magazine, which was full of all sorts of fun images. Savina encouraged us to find small subjects that we could place in an unexpected setting, so I started tearing out people (and a costumed dog) that caught my eye. As I was looking for settings, I found an article about the 50th anniversary of Heather Farm Park. That's where Steve and I got married, 18 years ago. I set it aside, along with other landscape photos. After I finished making the whimsical dog and the kayaker collages, I made a third (larger) collage of the scenery of the part of California I call home. I added the word HOME and a heart. 


This was one of my very favorite classes. I like each of my collages and I had so much fun making them. I definitely need to do collage more often. 

---------


The first class on the final day of Sketchbook Party was "Paint Mini Nature Scenes." 


The materials list mentioned paintbrushes, but not what kind of paint to use. I chose my watercolor set, which turned out to be the wrong choice. Despite working as fast as I possibly could, I simply couldn't keep up with Merel Djamila's pre-recorded session. 


As it turns out, that wasn't my fault. She mentioned in the Q&A afterward that she'd taken 3 hours to do the paintings (and dried them between layers) and had edited the footage down to 30 minutes. No wonder I couldn't do in 30 minutes what she'd done in 180 minutes!

---------

The next class was "Sketchbook Spreads: How to Make Them and Why You Should Create Every Day." 


Erika Lamar Buentello's materials list said we'd be using water-based markers, so that's what I got out. Until I saw the color palette we needed. I made a quick switch to my Prismacolor alcohol markers, which ended up being a good decision. She led us through drawing the casita, then started with some leaves before we ran out of time. 


I enjoyed this class a lot. I wish we'd had more time; she was planning to have us fill both pages with a variety of related images. I also wish I'd seen ahead of time that there was a reference photo. Once again, I hadn't printed it and couldn't bring it up on my iPad without losing the class, so I was drawing blind. Fortunately, Erika did an excellent job describing the skeps and demonstrating each. 

The next class turned out to be another of my favorites and common in the scrapbook world. I'll tell you about that and the last of the classes tomorrow. 

11/23/22

Sketchbook Party: Terry Runyan, Natalie Lundeen, and Jeanetta Gonzales

This is the third of five posts about Sketchbook Party. I recommend reading the first and second posts before you read this one. 

---------

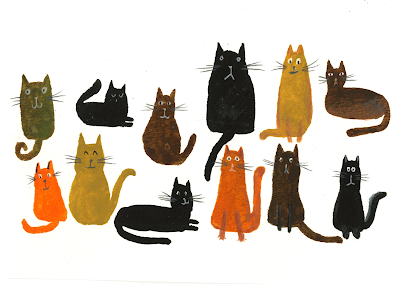
The seventh class during Sketchbook Party was "Paint Watercolor Cats." 


As promised, Teri Runyan taught us how to paint watercolor cats. I used Koi watercolors, then used white, black, and grey Prismacolors to add the facial features.  


This class was one of my very favorites. I had no idea how easy, relaxing, and fun it is to paint blobs and turn them into cats! I will definitely be doing this again in the future. I'd like to play with using a similar technique to make other animals too. (Bunnies, obviously.)

---------


Next up was "Sketch a Lush Landscape in Mixed Media." 


I was set to use water-based markers for this project, but the first thing Natalie Lundeen told us was that we'd want 5 or 6 shades of green. I don't have anywhere close to 5 shades of green water-based markers and I don't have any water-soluble crayons, so I made a quick switch to the Faber-Castell colored pencils that were within reach. So much for mixed media.


This project was very frustrating for me. I wasn't sure what we were drawing and I was struggling to watch the instructor and draw my own with materials that were different than what she was using. I don't like my finished project at all. 

---------

Next was "Make Pattern Borders." 


Jeanetta Gonzales emphasized that we could use pretty much any medium we wanted to make patterned borders. I chose Sharpies for this project and it was a good choice. The gold Sharpie really pops against the bold colors. 


I don't know that I learned anything new from this class, but I really enjoyed it. Repeating patterns appeal to me and I liked working entirely with Sharpies. 

After this class, I cleared off my desk for the last class of Sketchbook Party Day 2. It was really different than anything we'd done in the previous classes. I'll tell you all about it tomorrow. 

11/22/22

Sketchbook Party: Elina Lukas, Sarah Renae Clark, Nicki Traikos

This is the second of five posts about Sketchbook Party. I recommend reading the first post

---------

The fourth Sketchbook Party class was called "Sketchbook Practice for the Anxious and Worried." Perfect! I frequently struggle with both anxiety and worry. 


Elina Lukas instructed us to write a word in the upper left hand corner of our paper describing our mood. I misunderstood and wrote my desired mood (peaceful) rather than my current mood (frenetic). Then she had us to pick a few colors in our chosen medium, reaching only for what felt right. For me, that was Folk Art acrylic paint and Prismacolor colored pencils in peaceful shades of blue. Then she told us to apply bits of color to the paper in a way that appealed to use while she talked in a quiet, soothing voice. 


After a while, she stopped and told us to write our current mood in the upper right hand corner. That was when I realized I'd misunderstood the original instruction. But, I'm happy to report, I felt very much at peace! Although bits of stress leaked in when I realized my paint was still too wet to apply the colored pencil I'd planned to use and that my 'finished' project did not feel finished to me. 

But, as I told you in the first post, I'm sharing only what I made during the class, without adding anything after it ended. I may eventually work more on this piece, because I really do want to see what it could become. 


---------

The next class was "How to Draw Florals and Other Planner Doodles." I've been following Sarah Renae Clark for a little over a year and she is incredible. Of the 16 artists who taught during Sketchbook Party, she was the only one I knew before the event started, and I only heard about it because she mentioned she'd be teaching there. So I have Sarah to thank for my crazy-awesome, art-packed weekend. 


Sarah walked us through how to doodle a variety of flowers, leaves, banners, and more. This is what I made, using just a black Flair pen


Sarah's class was a ton of fun, just as I knew it would be. 

---------


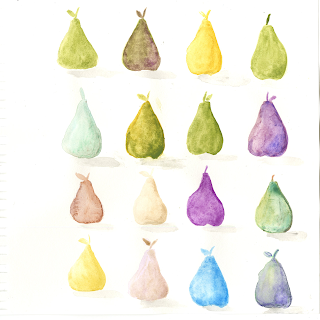
The sixth class, and the first of Day 2, was "Paint Loose, Playful Pears in Watercolor." 


It was exactly as advertised. Look at my fun pears!


I used my beloved Koi travel watercolor set to make my pears. It was a lot of fun trying unconventional colors, blending colors, and just playing. 

And, as it turned out, it was a great warm-up for the class that followed. I'll tell you about it, and two other classes, tomorrow. 

11/21/22

Sketchbook Party: Melissa Lakey, Lisa Congdon, and Kolbie Blume

On Thursday morning, I heard about Sketchbook Party by Pigeon Letters for the first time ever. By Thursday afternoon, I had registered and paid the $29 fee (so affordable!). Classes started Friday morning at 11:00 am. All weekend, I have been taking art classes online... sixteen hour-long classes, to be exact. It's been exhausting and exhilarating, frustrating and fabulous, all at the same time. I've learned so much and am so glad I joined!


Throughout this week, I'll tell you about each of the sixteen classes. I'll share everything I made, even the stuff that is ugly. Sketchbook Party was about experimentation and growth, not completion or perfection. I've resisted the temptation to go back and finish my projects; what you see is what I did during the live instruction. 

Each class had a supply list, which you'll see below. We were encouraged to use what we had; in my case, that didn't always match up with the supply list. I'll be using affiliate links to share what supplies I actually used for each project. 


---------


The first class was called "Sketch a Cozy Night Scene." 


Melissa Lakey led us through a directed drawing of a bookstore at night. I used Tombow Dual Brush Pens, a black Flair pen, and a grey Prismacolor pencil


I struggled with this project. Not because it was difficult to draw, but because I had technological issues at the start and was never quite able to catch up with Melissa after that. I didn't print the reference photo and wasn't able to get it to come up during the class, so I was drawing blind. Despite all that, it was a lot of fun. I would like to go back and try this project again; I know the results would be much better.


---------


Lisa Congdon's class was called "Make a Cut Paper Abstract Collage." 


This was right up my alley. I love patterned paper and work with it all the time. I enjoy collage and the freedom of abstract composition. 

I have a huge collection of patterned paper scraps, so I picked out 12 or so that I liked and dove in. I actually used a Pioneer glue stick for this project rather than the Tombow Mono I always use with patterned paper. 


I love how my collage turned out. It looks absolutely nothing like Lisa's (literally not a single similarity) and it is so me. I need to do more collage.  

---------

The third class was called "Monet's Garden." 


I used the travel watercolor set that I love. No other supplies needed! 

Kolbie began by guiding us through swatching, then moved on to mark-making. She emphasized making blobs of color to mimic the impressionist style rather than trying to recreate a shape realistically. 


It should come as no surprise that impressionism isn't my thing. I tried to make Monet's garden (top left) but was much more happy with the fall trees I painted while cleaning off my brush between colors (bottom left). 

Tomorrow I'll show you the results from the next three classes. Like these, it was really a mixed bag. They definitely stretched my creativity!

11/18/22

Best Cities for Tourists Without a Car

I receive a lot (A LOT) of press releases and story pitches on a huge variety of subjects. Some are a great fit for my blog; most are not. Occasionally, I receive one that seems like a miss at first, but sparks an idea for my blog. Such was the case with Lawn Starter's interesting research about the best cities in the United States to live without a car. They looked at the walkability, transit options, climate, pedestrian safety, and other factors in order to compile their ranking of 200 cities. The results are fascinating, but not exactly relevant to my blog. 

Or maybe they are. As a travel blogger, I don't particularly care which cities are best to live in without a car, but I definitely am interested in which are the best to visit without a car. When I plan trips, one of the first things I check is whether or not we will need to rent a car after we fly to our first destination. It makes no sense to rent a car to drive from the airport to the hotel, then pay to park that car at the hotel for 3 days while we walk to all the attractions. 

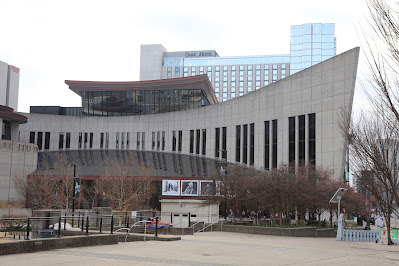
Below you'll find my own list of 10 cities we have visited that are great for tourists without a car. In each case, the tourist attractions are all within a reasonable (and safe) walking distance of hotels and/or the cities have convenient (and safe) public transportation options or a hop-on-hop-off bus that hits the major sites. For fun, see if you can identify the city just from its nickname and the photo. Then click the image to see if you're right and to read about our family's experience in that city. 


Best Cities for Tourists Without a Car


1. The City of Roses


2. The City of Brotherly Love


3. Music City


4. Emerald City


5. The City Different


6. Cream City


7. The Windy City


8. The Live Music Capital of the World


9. Mill City


10. The Big Easy


Were you able to guess them all? Do you know of other cities that belong on the list? Let me know in the comments!