Today's project is the eighth craft in my series based on crowd-sourced responses to ten questions. This time I asked my friends to name a US landmark. Mt. Rushmore was the most frequent answer, but I shared a Mt. Rushmore craft idea last year. So I went with the second most popular answer, the Statue of Liberty.
I started by thinking back to my visits to the Statue of Liberty. I first visited New York City and the Statue in 1989, when I was 17. In the spring of 2001, a fellow teacher and I took students to Washington DC and New York City, which included a visit to Lady Liberty. My most recent time seeing the Statue was in 2014, when we sailed into NYC at sunrise. While each visit was fantastic, I realized I've seen the Statue at dawn and in the daylight, but never at sunset. That was the inspiration for my project.
Statue of Liberty at Sunset Painting
Materials:
- watercolor paper
- acrylic paint
- photo of the Statue of Liberty
- pencil
Steps:
Use a large brush to wet the watercolor paper, then add horizontal streaks of blues, purples, oranges, and pinks to make a sunset. There's no right or wrong. Continue until you're happy, then set it aside to dry.
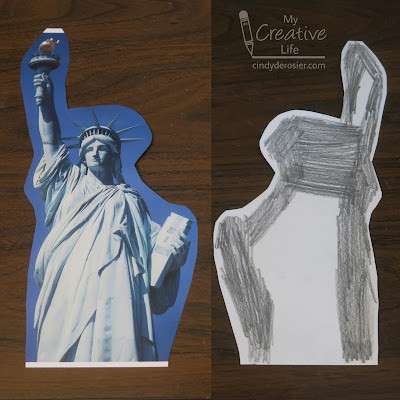
Print out a photo of the Statue of Liberty, then trim away the background. Turn it over and scribble on the back with an ordinary pencil. You'll be using this to transfer the image to the paper, so you only need to color the edges, as shown below.

Tape the edges of the watercolor paper to the desk to keep it from moving, then use paperclips to secure the image to the paper.
Trace along the outline of the Statue with a pencil, pressing firmly. Lift a corner to make sure the line is transferring well.
When you've traced the entire outline, remove the paperclips and set the image aside. Fill in the traced area with black paint.
I really enjoyed this project. It makes me wish I were still teaching 5th graders specifically so we could do this project and I could display a whole bulletin board's worth of these.


You did a great job! It looks fabulous!
ReplyDelete