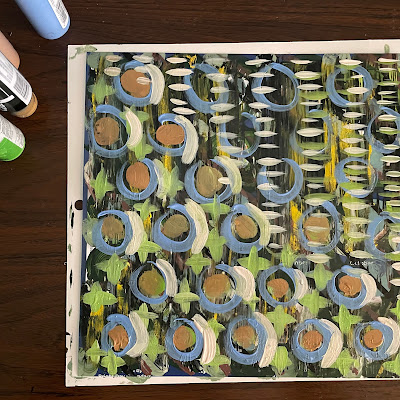
Playing with paint is so much fun! I used the back page of an old calendar to make this name art. This project has no rules. It's all about play and experimentation. Don't overthink it. In fact, try not to think at all!
I started by picking 9 colors of Folk Art paint (affiliate link here and below). I made a pattern of loose circles in dark green all over the page, then added blobs of light green and light blue between them. Some of the bunnies on the calendar are still visible at this point. That white border is the paper I put under the calendar page to protect my desk surface. It wasn't big enough, but I made it work.
When the first layer was dry, I cut zig-zags onto a scrap of cardboard. Then I painted alternating diagonal lines in black and brown, and dragged the cardboard through them.
While the lines were still wet, I used the other side of the cardboard piece to smear some yellow onto the page.
Then I added blobs, circles, arcs, lines, and crosses. No thinking. If you don't like something, cover it up.
When the paint was completely dry, I used this Word Search rubber stamp to add text in black. Then I cut out the letters of my name from scratch paper so I could figure out how to fit five letters nicely in a square.
When I was happy with their placement, I painted around them with blue. I intentionally left thin spots and brushstrokes. Finally, I outlined the letters with a white Apple Barrel paint pen.
This project was so much fun to do! And what makes it really cool is that it is one-of-a-kind. I could use the exact same materials and steps and try to recreate it, but it would still look different each time I made it. I'd love to see what a classroom full of these would look like - they'd all be completely unique!


No comments:
Post a Comment
I moderate comments, so you will not see yours appear right away. Please check back if you had a question; I promise to answer it as soon as I see it. Thank you for taking the time to comment!