Showing posts with label candy melts. Show all posts

3/6/24

Personalized Candy Bar

One of the highlights of our visit to Hershey, PA was the Create Your Own Candy Bar experience. Everyone in our group of 9 chose a different combination of ingredients to put in their personalized bar. Part of the activity was designing our own packaging with our names. It was so much fun. I'd been thinking about it recently and thought how neat it would be if the candy bar itself was personalized with our names. I did some experimenting and came up with this: 

Personalized candy bar, featuring your name!

My prototype is a lemon-lime candy bar with rainbow sprinkles, but yours could be literally anything. There are so many colors of Candy Melts available; pick two colors and then use LorAnn flavorings to give each a different flavor. If you're a chocolate fan, try dark chocolate with white chocolate letters and toffee bits around the edges. That would look (and taste) fantastic. Obviously, you can also add any mix-ins you want to the bar itself. The possibilities are endless!

I used a silicone mini loaf pan to make my bars because that's what I have. It was fine, but using a mold actually intended for candy bars would be better. I've put one in the materials list. Affiliate links below. 


Personalized Candy Bars


Materials:


Steps: 

Start by making your name. Melt the selected color following the instructions on the package, then add your desired flavor. Fill the appropriate letters in the mold. When the candy is set, pop the letters out onto parchment paper. 


Melt the candy you've chosen for the bar itself and add the desired flavor. Pour the melted candy into the candy bar mold (or loaf pan). Gently place the letters onto the surface of the candy. You can leave them raised or gently push them so they're flush with the surface. 


Add sprinkles, nuts, coconut flakes, or whatever you want to the edges of the candy bar. 


Don't be limited by the size of your mold. I made an oval-shaped mini version of a candy bar with just my initials and it came out well (although I was a bit overzealous with the sprinkles). 

Personalized candy bar, featuring your name!

When the candy is set, pop it out of the mold and enjoy! To give personalized candy bars as gifts, place the bars in appropriately-sized treat bags. These would make adorable (and edible!) gift tags that anyone would love to receive. 

1/15/24

Olympic Rings Treat on a Stick

Back in December when I spotted round pretzels at the store, my first thought was "Olympic rings!" I ended up using them to make an edible Christmas wreath first, but now I made my rings. Affiliate links below. 


Edible Olympic Rings on a Stick


Materials: 


Steps: 


Working with one color at a time, prepare the Candy Melts according to the package directions. Dip a pretzel and allow the extra to drip off, then set it onto a sheet of parchment. Repeat the process until you have blue, black, red, yellow, and green rings. Let the candy set.

Arrange the rings in order on a clean sheet of parchment paper. You can line up your pretzels next to each other, or with 'interlocking' rings like I did on the bottom left. I used broken pretzel pieces to prop up the blue, black, and red rings on top of the yellow and green ones. In the end, the side-by-side rings were easier to make and stayed together better. 

Light the candle and place it nearby. 


Connect the rings by holding a blue pretzel over the candle for a second or two. Replace it on the parchment, pressing gently against the black and yellow rings. 


Melt the green ring and press it against the yellow and black rings. Finally, melt the red ring and press it against the black and green rings. 

When the joints are solid (about 5 minutes, depending on the temperature), flip the joined rings upside down. Melt some white candy and dip the end of a lollipop stick in it, then press it behind the black, yellow, and green rings. Do as I say and not as I do: I used green candy and it shows through. 


If you're looking for other Olympics crafts, I have a bunch! You can also find ideas for crafts inspired by many of the summer and winter events among my Sports Crafts for Kids. Enjoy!

12/12/23

Edible Christmas Wreath

Three years ago, I shared an edible Advent wreath that was super fun to make and turned out really cute. Today's craft is another wreath. But this time it's a Christmas wreath and it's made from different items. See if you can guess what I used, then scroll down to find out! Affiliate links below. 


Edible Christmas Wreath


Materials:


Steps: 


Cover your work surface with parchment paper, then melt the Dark Green Candy Melts following the instructions on the package. 

Coat a pretzel ring with candy, then use the skewer to set it on the parchment. Sprinkle some nonpareils onto the pretzel, then add sugar sprinkles. If you have a partner to do this, that is very helpful. Working alone, I dipped three pretzels before doing the sprinkles for each. (By the way, you can make your own colored - and flavored - sanding sugar very easily.)


While the mini wreaths are hardening, use a sharp knife to cut a Rice Krispie Treat into thin slices. Use these to make a bow. I took three strips of the same length, curved two to make the loops of the bow, then cut the third in half to make the tails. 


Once you have the basic shape, smoosh the parts together. Then curl the ends slightly. 


Melt the Red Candy Melts, following the instructions on the package. I tried multiple techniques for coating the bows. What worked best was to pour the candy over a bow while it is flat on the parchment paper, then pick it up with skewers, briefly hold it vertically, then set it down on a clean area of the parchment. As soon as you set it down, add the red sprinkles. 

Coat Kix with the melted candy, then place them on the parchment in clumps of three. 

When everything is set, it's time to assemble. You have two choices: either keep everything separate for easy eating (people can grab a single pretzel or two from the wreath) or adhere everything together. I chose the former. The only difference is that you will need melted candy "mortar" to act as glue between everything. 

Arrange one layer of pretzels on a plate (mortar optional), then add three more layers, off-setting each layer from the previous one. Add the Kix-clusters and the bow. 


So how does it taste? Fantastic! A thin candy coating adds just the right amount of sweetness to the salty pretzels. This showstopper will be a hit at any Christmas celebration. 

10/14/22

Vampire Fang Treat Bags

If you're one of those weirdos who hates candy corn, or if you can't get behind the idea of candy-coated candy, today's craft isn't for you. Feel free to check out my other Halloween craft ideas

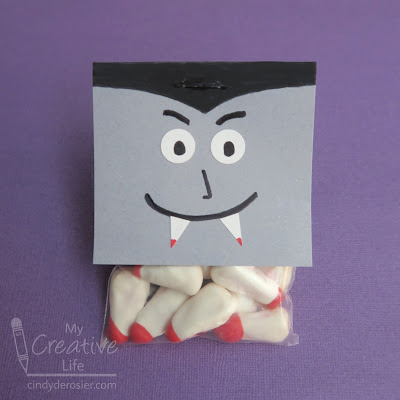
Still with me? Good! Because if you think adding a candy coating to candy is fine, you're probably also fine with giving out edible bloody vampire teeth on Halloween. You're my kind of people. Affiliate links below. 


Vampire Fang Treat Bags


Materials:


Steps: 


Melt the white candy according to the package instructions. Coat the candy corn with the melted candy and let the excess drip off, then set it on a piece of parchment paper. 


When the candy is completely set, melt a small amount of red candy and dip just the tips. Allow the candy to set completely. Put about 12 fangs into each treat bag, then set them aside. 

Cut one 3" x 6" rectangle for each vampire you're making. Fold the paper in half so that the face is a 3" x 3" square. Punch two eyes from the white cardstock, then cut out two tiny triangular fangs. Use the black pen to draw the vampire's widow's peak, using the fold line as a guide. Draw pupils on the eyes. Add a tiny bit of red to the ends of the fangs.


Glue the eyes to the face, then draw eyebrows, a nose, and a smile with the black pen. Glue the fangs in place. Staple the treat toppers to the bags of candy fangs and you're ready to dispense your candy-covered candy.

If you need another idea for an edible vampire craft, be sure to check out my Dracula Smores!

9/29/22

Cinnamon Spice Caramel Apple Popcorn with Felt Apple Tag

Tis the season for Pumpkin Spice Everything, but personally I don't get it. Pumpkin is fine, but for me fall is all about apples. Apples are sweet, sometimes tart, crisp, and full of flavor. They are delicious on their own, as juice or cider, mashed up as applesauce, baked with savory dishes (like pork), and excellent in desserts of all sorts. I like squash (though pumpkin is not even one of the best squashes), but there's no comparison. Virtually everyone agrees that Apple > Pumpkin. Spices definitely improve pumpkin, but I firmly believe Apple Spice > Pumpkin Spice. Don't even try to argue. 

If you're tempted to argue, make some cinnamon spice caramel apple popcorn first. Then get back to me and tell me that pumpkin spice is better than apple spice. Affiliate links below. 


Cinnamon Spice Caramel Apple Popcorn

  
Ingredients:                                                           


Steps: 


There is no right or wrong when making your own flavored popcorns. It's not like baking a cake where chemical reactions mean that quantities matter. You can add more or less of any ingredient. I was hesitant to even put quantities above, as I didn't measure when I was making mine. Those are my best guesses. 

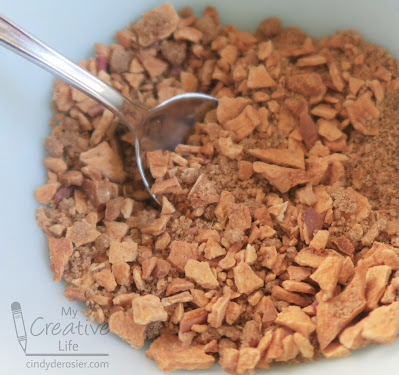
Start by crushing some crisp dried apples until about half of the apples are powder and the rest is pea-sized bits. Stir in some brown sugar and cinnamon, then add a dash of nutmeg. Mix thoroughly. 


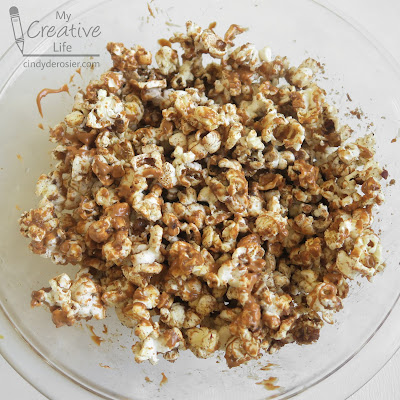
Pop and generously butter approximately 10 cups of popcorn. Immediately pour the apple mixture over the popcorn and stir well. Some of the apple mixture will remain at the bottom of the bowl instead of stuck to the popcorn, but that's not a problem. 

Follow the directions to melt the Salted Caramel Candy Melts. Drizzle half of the melted candy over the popcorn and immediately stir well. Repeat with the remaining candy. Most of the apple mixture should now be stuck to the popcorn. 


If you eat the popcorn immediately, the tiny apple bits are still crispy. If you let the popcorn sit for a while, or bag it up, the apple bits will soften, but remain equally delicious. 

I made a cute felt apple tag to label my bagged popcorn. It's a quick and easy project. 

-------


Felt Apple Tag


Materials: 


Steps: 

Cut out an apple from the red felt, using pinking sheers. Cut the leaves and stem from green felt with regular scissors. Apply green Stickles to the leaves and set them aside to dry. 

Use two strands of black embroidery floss to backstitch a smile and two eyebrows.

Cut a piece of red cardstock that is slightly smaller than the felt apple. Glue it to the back of the apple, covering the knots from your stitching. Write a message to your recipient. 

Glue the googly eyes and the leaves to the front of the apple. 

4/26/22

Candy Cardinals

I had some extra black Candy Melts and black Sugar Pearls sitting out after I finished making the Pretzel Raccoons, so I used them to make Candy Cardinals. Can you tell what I used to make the beaks? Affiliate links below.   


Candy Cardinals


Materials:


Steps:


Melt the red candy according to the instructions on the package. Use a spoon to put a dollop of melted candy onto parchment paper, shaping it into the teardrop that makes the cardinal's head. While the candy sets, use a sharp knife to cut orange M&Ms in half. Press straight down firmly; they'll cut without shattering. 

Melt the black candy, then put a dollop onto the head to make the cardinal's face. Place two black sugar pearls and half an M&M onto the black candy to make the eyes and beak. Let the candy set completely, then peel it up from the parchment paper. 

---------


Looking for another cardinal project? I love this tissue paper cardinal craft! The cardinal is the state bird of Illinois, Indiana, Kentucky, North Carolina, Ohio, Virginia, and West Virginia, so it's an especially great choice to make if you live in one of those states. 

4/22/22

Pretzel Raccoon Craft

If you've been searching high and low for an edible raccoon craft, I have good news.


I was sketching a pretzel (as one does) when I noticed that the little nubs at the ends of the arms (do pretzels have arms?) looked like ears. So I dropped what I was was doing and made some raccoons. You'll notice I experimented with different ways to make whiskers on two of them and left the whiskers off the others. I prefer the no whiskers, while Steve says the white whiskers are best. Rather than a tutorial with one or the other, you get both. Affiliate links below. 


Edible Pretzel Raccoons


Materials:


Steps: 


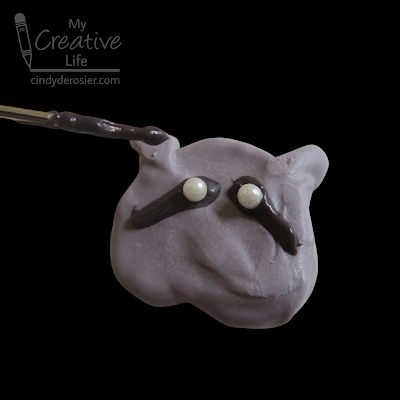
Follow the instructions on the package to prepare the Candy Melts. I used 10 white discs and 3 black to make grey. Dip each pretzel in the melted candy, then transfer it to a sheet of parchment paper. Fill the holes of the pretzel with more melted candy. If the ears aren't prominent, add a little extra candy to emphasize them. Let the candy set. 


Follow the package directions to melt the black candy. Dip the scribe tool into the black, then lay it across the face (angled downward) to make one side of the raccoon's mask. Add a white pearl eye, the repeat on the other side of the face. 


Use more black to color the inner ears. 

If you want to make whiskers, do it now. For the white whiskers, I tried to use the same technique as with the marshmallow bunnies, but it didn't really work (since the marshmallow was convex and the pretzel surface concave), so I just drew them on. I used a clean scribe tool to etch whiskers from the solid grey, but it was really hard to get clean lines. Ultimately, I decided I preferred the raccoons whiskerless. Your call. 

Put a tiny amount of black candy onto the scribe tool, then touch it to the white sugar pearls to add pupils to the eyes. Add a dot at the bottom of the face to adhere the black sugar pearl nose. 

---------


If you're looking for more raccoon crafts, I have two others: a cardboard tube raccoon, inspired by The Kissing Hand, and a Valentine's Day raccoon that you could make with any box of treats, not just conversation hearts. 

Fun Fact: Tennessee named the raccoon its official state wild animal in 1971. 

3/30/22

Bunny Week 2022: Marshmallow Bunnies

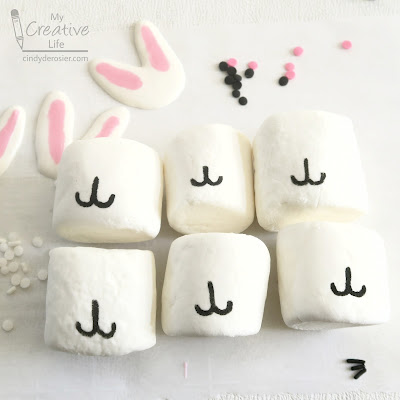
If this group of marshmallow bunnies doesn't make you smile, I don't know what will! These were so much fun to make. I'm particularly pleased with how the whiskers came out. That was a spontaneous addition and I think they make a big difference. Give them a try! Affiliate links below. 


Marshmallow Bunnies


Materials: 


Steps: 


Draw a pair of rabbit ears on a piece of scratch paper. You'll be using this as a guide to keep the ears in proportion with the marshmallow. 


Slide the ear sketch under a piece of parchment paper, then prepare the pink and white Candy Melts following the instructions on the packages. 

Spoon the white candy onto the parchment paper so that it fills the pattern you made for the ears. Immediately use the scribe tool to drizzle a thin line of pink candy on top of the white candy to make the iner ears. Fix any stray bits or lumps with the scribe tool. I found it easiest to keep two scribe tools handy (one for each color). 

Carefully slide the parchment paper over so that the pattern is under a clean area. Repeat the steps to make the next set of ears. Continue until you have all the sets of ears you'll need. Set them aside to harden completely. 


Use the Food Writer to draw mouths on each marshmallow. Pick out enough pink and black confetti sprinkles to give each bunny two eyes and one nose. 


Remelt the white candy. Dip the scribe tool into the melted white candy and use it to draw whiskers onto each bunny. Then add dots of melted candy to adhere the black sprinkle eyes and pink sprinkle nose in place. 


To attach the ears to the bunnies, you'll need a warm, flat surface. Something like a frying pan would work, but I just used a small ceramic dish. I filled it with water, then put it in the microwave until the water was boiling. I poured out the water, then inverted the dish on a potholder. 

I picked up a pair of ears using kitchen tongs (so my warm fingers wouldn't melt them) and pressed them gently against the bottom of the hot dish. Then I placed them onto a marshmallow. The candy solidified almost instantly, so I didn't even have to worry about propping the ears up as they dried. 


Each bunny looks a bit different from the rest. Marshmallows surprisingly irregular; I tried to find six that were sort of the same size and shape, but gave up and just picked any six. The fact that the marshmallows differ took away any pressure I might have felt to try to make the ears and faces look identical. 


If you make your own marshmallow bunnies, I'd love to see them. For that matter, I always enjoy seeing any crafts made from my tutorials. My email address is right above my picture - send me a photo of your creations!

3/24/22

Pretzel Monarch Butterflies

I've used pretzels to make a butterfly craft before, but that was a savory project suitable for young children. This is a sweet craft, better for preteens and up. I had a lot of fun figuring it out as I went and I'm happy with the end results. Affiliate links below. 


Pretzel Monarch Butterflies


Materials:


Steps: 


Place a sheet of parchment paper underneath a wire rack. Prepare the black candy melts following the directions on the package. For each butterfly, dip two pretzel twists and one pretzel stick into the melted black candy, then transfer them to the rack. I used a sharp knife to make the pretzel sticks shorter; whether you need to do this or not depends on the brand you use. After the pretzels have sat for 30 seconds, transfer them to a different part of the rack so that they don't stick. Let them set completely. 


You'll be melting more black candy, so don't clean that container yet. 

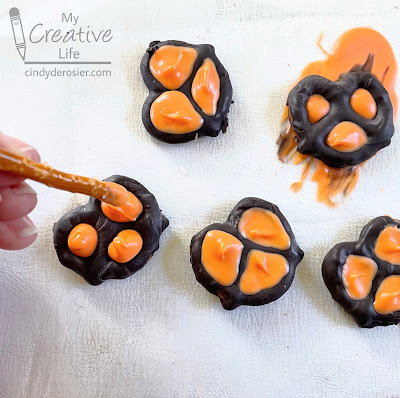
Move the rack, then transfer the pretzels to the parchment paper. Prepare the orange candy melts. I experimented with different methods of filling the holes of the pretzel twists with orange (see failures below). I found the easiest and most effective method was spooning a dollop of melted candy into each opening, then using an extra pretzel stick to push it over the black candy. The goal is to leave a thin border of black between the orange areas. 

In retrospect, I should have used the scribe tool to get rid of the peaks in the orange that the pretzel stick left. 


When the orange has set completely, prepare more black Candy Melts. Use the scribe tool to draw lines of black candy across the orange to mimic the patterns of a monarch butterfly. Symmetry is more important than accuracy, so work on both the left and right wings at the same time so that you end up with matching pairs. Let the black candy set. Don't clean the container or the scribe tool - you'll use both again.  


Prepare a small amount of white Candy Melts in a separate container. Use a clean scribe tool to put dots along the outer edges of the pretzels. Again, work in pairs and focus on symmetry. Let the white candy set. 


Crumple a small piece of foil into a cradle to hold the butterfly wings in the position you want. Do this for each of your butterflies. Carefully remove the pretzel twists, keeping the stick pretzels in position. Melt more black candy. Working on one butterfly at a time, use the scribe tool to paint a line of melted candy along each side of the stick pretzel, then gently place the pretzel twists back into position.  


Reinforce the wings by adding a bit of extra black candy along the point where the wings meet the body. Let the candy set completely, then remove the butterflies and place them onto frosted cupcakes. 


Happy spring, everyone! Celebrate with a cupcake. 

11/16/21

Turkey Lollipop Cupcake Topper

Pumpkin pie is ok, but frankly I'd rather have a turkey lollipop in a cupcake as my Thanksgiving dessert. Affiliate links below. 


Steps: 


Put a sheet of parchment paper down on your workspace, then prepare the yellow and orange Candy Melts following the directions on the package. Spoon a quarter-sized dollop of orange Candy Melts onto the parchment paper, then add a nickel-sized dollop of yellow directly on top. Drag the toothpick through the candy to blend the colors and make the feathers. Repeat this process for each of the turkeys you'll be making. 


Prepare the rest of your supplies: unwrap the lollipops you'll be using, set out pairs of candy eyeballs, pick out pairs of red mini hearts, and use a sharp knife to cut the mini M&Ms in half (just press straight down, slowly and firmly).  Melt the Dark Cocoa candy melts according to the directions on the package. Dip a lollipop into the melted candy, turning to coat it on all sides. Place it on top of one of the turkey feathers, then place the the eyes, M&M (beak), and hearts (wattle) onto the face. The M&M should be sitting cut-side down and the two teeny hearts should be right up against each other without a gap. 

Repeat this for as many turkeys as you need. Let them set at room temperature for at least 15 minutes, then poke each lollipop turkey into a frosted cupcake. 


What about you? Would you rather have pumpkin pie or a turkey cupcake following the big meal? Or maybe both? Of course, you could pop these turkeys into slices of pumpkin pie or whatever else you're serving. Lots of possibilities!

10/20/21

Dracula Smores

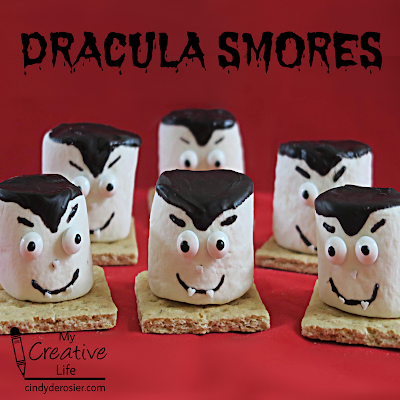
Smores aren't just for summer. Nor are they just for camping. They are just as appropriate indoors for Halloween. Evidence: 


I had so much fun making these! They came out exactly how I'd hoped. Affiliate links and cooking suggestions below. 


Dracula Smores


Materials:


Steps: 


Prepare the Candy Melts according to the package directions. You'll need about 1.5 discs per finished smore. (I used 8 discs for 6 smores and it was just right.)

Dip the top of each marshmallow into the melted candy, then turn it to allow the candy to start to drip down one side to make Dracula's famous widow's peak. Stop the dripping by turning it upside down again. Within 20 seconds or so, it will firm up enough not to drip anymore. 


Use a toothpick to dab a small amount of melted candy to the back of the candy eyeballs and place them on the face. The dip the end of the toothpick in candy and press it to the marshmallow, just above the eyes, to make the eyebrows.


Use the toothpick to make a tiny dot for the nose and attach a white heart sprinkle. Draw a melted candy mouth with the toothpick and attach two heart sprinkles to make the fangs. I had to warm up the melted candy halfway through making my six Draculas. 

Place the Draculas on top of graham cracker halves. You can put a dollop of melted candy down first if you want them to stay in place. I didn't, because I wanted to experiment with cooking my smores. 


Experiment 1: Microwave. 

I set one smore on a plate and put it into the oven for 45 seconds at 50% power. As expected, it puffed up huge. I didn't not expect the eyeballs to pop off, nor for the face to basically melt away. 


Verdict: Quick, and easy, but with no browning it's missing most of what's good about smores. Not to mention, the end result is decidedly not adorable.  2/10


Experiment 2: Stovetop.

I poked a skewer into a Dracula and heated it over the stovetop, attempting to get a perfectly-golden toast while not letting anything drip or drop into the stove and make a huge mess.


Verdict: Not as quick and easy as the microwave, and definitely less safe. The eyes slid a bit despite my efforts to keep that side up. The back of the marshmallow got some nice browning and I was able to get some gooey melting going on.  5/10


Experiment 3: Toaster Oven. 

I must have been feeling confident, because I put two smores on foil into the toaster oven with the setting on TOAST. Within 30 seconds, their eyes started sliding downhill and their tops were bubbling...


... so I took them out, laid them on their backs, and put the eyeballs back where they belonged. Then I slid them back into the toaster oven. 


When their faces had a decent tan, I took them out and set them back up on their graham crackers. 


Verdict: This took more effort than the other methods, but it yielded the best browning and melting. I was concerned that the hair was burnt, but it wasn't. It tasted like the sugar on top of creme brulee and was nice and crackly. Yum! I think if I'd used white candy melts to attach the eyeballs, it wouldn't be as obvious that they're drooping in the finished Dracula. Next time.  7/10

Enjoy!