Showing posts with label wreath. Show all posts

2/19/24

Bread Rose Wreath

Remember the rose wreath that I made out of air-dry clay? I made an edible version (bread dough instead of clay). 


The shaping process was somewhat similar, but the bread dough was much more difficult to manipulate than the clay. Still, it was a fun experiment with delicious results. I used the same basic recipe as for the Sixty-Minute Cloverleaf Rolls, then veered off in a different direction for the shaping and baking. 


---------


Bread Rose Wreath


                                                    3.5 to 4.5 cups flour                            1 cup milk
                                                    3 tablespoons sugar                            1/2 cup water
                                                    1 teaspoon salt                                    1/4 cup butter
                                                    2 packages Fleishmann's yeast


In a large bowl, mix 1.5 cups flour with the sugar, salt, and yeast. Set it aside. Combine milk, water, and butter in a saucepan (or microwavable bowl) and heat until liquids are 120-130°F. Add the liquid ingredients to the dry ingredients and beat at medium speed for two minutes, scraping bowl occasionally. Add 0.5 cup flour and beat at high speed for two minutes. Stir in enough additional flour to make a soft dough. Turn out onto a floured board and knead until soft and elastic, approximately 5 minutes. Place in a greased bowl, turning to grease top. Cover, then place in a warm place (approximately 98°F) for 15 minutes. 

Turn the dough out onto the floured baking mat. Divide dough in quarters, then divide each quarter into three equal pieces. You should have 12 balls of dough, each the same size. Roll 9 of the balls into long ropes, approximately 18" long. Braid three ropes together. 


Curl the braid into a wreath and place it on a Silpat-lined baking sheet. Repeat with the other 6 ropes to make three wreaths in all. 

Divide each remaining dough ball into 9 pieces. Roll the pieces into balls, then smoosh them with the ball of your hand to make petals. 


Pick up one petal, then roll it up to form the inside of the rose. Pick up the next petal and roll it around the center of the rose. Continue the process with the rest of the petals. Place the finished rose on the baking sheet.  

Loosely cover the dough and let rise in a warm place, for approximately 15 minutes. Meanwhile, preheat the oven to 425°F. Bake for 15, then check the roses for doneness. Remove them from the oven and bake the wreaths for another 10 minutes or until done. While the wreaths are still hot, nestle the roses into the wreaths. Let the bread cool on a wire rack for at least 10 minutes. 


Shop my affiliate links! 

                                  Silpat                                            Sili Bake                                         Fleischmann's Yeast

1/21/24

Clay Rose Wreath for Valentine's Day

I made this rose wreath using air-dry clay and acrylic paint, with Valentine's Day in mind. Now that I'm seeing it on the screen, I'm wondering if I could have used bread dough to make an edible version. I may have to try that! Affiliate links below. 


Clay Rose Wreath for Valentine's Day


Materials:


Steps: 


I used four 1-ounce packets of Model Magic for my project. You can obviously use more or less clay to make a larger or smaller wreath. I used a blend of colors of Model Magic because that's what I had on hand; painting would have been easier if I'd started with colors closer to what I wanted the finished wreath to be. 

Knead the clay to condition it, then divide it into fourths. Set one portion aside; you'll use it for roses and leaves. Roll the other pieces into long ropes. They should be approximately the same size and thickness. Press them together at one end.


Braid the ropes. When you reach the end, form the braid into a circle and gently press the ends together to make a wreath. Set it aside to dry. 

Divide the remaining clay into four equal pieces. Three will become roses and one will be leaves. For each rose, you'll have four petals. Divide the clay into four balls and roll each flat. Pick up one petal, then roll it up to form the inside of the rose. Pick up the next petal and roll it around the center of the rose. Do the same with the next two petals. If you don't like your rose, smoosh it and start over! 

To make the petals, roll the clay into tiny balls. Smoosh them with your thumb, then gently drag your thumb. This will curl the edges and make a point. 
 

Let the finished shapes sit overnight. Turn them upside down and let them side until they are completely dry.

Paint the wreath brown, the roses pink, and the leaves green. When the paint is dry, ink the edges of each piece. It's a small touch, but it makes a big difference. Finally, glue the roses and leaves to the wreath. 

12/12/23

Edible Christmas Wreath

Three years ago, I shared an edible Advent wreath that was super fun to make and turned out really cute. Today's craft is another wreath. But this time it's a Christmas wreath and it's made from different items. See if you can guess what I used, then scroll down to find out! Affiliate links below. 


Edible Christmas Wreath


Materials:


Steps: 


Cover your work surface with parchment paper, then melt the Dark Green Candy Melts following the instructions on the package. 

Coat a pretzel ring with candy, then use the skewer to set it on the parchment. Sprinkle some nonpareils onto the pretzel, then add sugar sprinkles. If you have a partner to do this, that is very helpful. Working alone, I dipped three pretzels before doing the sprinkles for each. (By the way, you can make your own colored - and flavored - sanding sugar very easily.)


While the mini wreaths are hardening, use a sharp knife to cut a Rice Krispie Treat into thin slices. Use these to make a bow. I took three strips of the same length, curved two to make the loops of the bow, then cut the third in half to make the tails. 


Once you have the basic shape, smoosh the parts together. Then curl the ends slightly. 


Melt the Red Candy Melts, following the instructions on the package. I tried multiple techniques for coating the bows. What worked best was to pour the candy over a bow while it is flat on the parchment paper, then pick it up with skewers, briefly hold it vertically, then set it down on a clean area of the parchment. As soon as you set it down, add the red sprinkles. 

Coat Kix with the melted candy, then place them on the parchment in clumps of three. 

When everything is set, it's time to assemble. You have two choices: either keep everything separate for easy eating (people can grab a single pretzel or two from the wreath) or adhere everything together. I chose the former. The only difference is that you will need melted candy "mortar" to act as glue between everything. 

Arrange one layer of pretzels on a plate (mortar optional), then add three more layers, off-setting each layer from the previous one. Add the Kix-clusters and the bow. 


So how does it taste? Fantastic! A thin candy coating adds just the right amount of sweetness to the salty pretzels. This showstopper will be a hit at any Christmas celebration. 

6/6/23

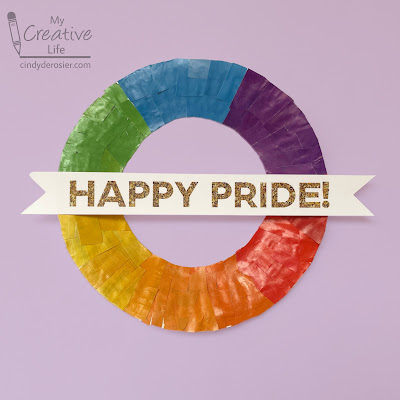
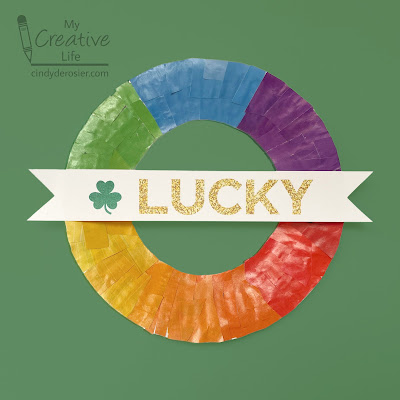
3-in-1 Rainbow Welcome Wreath

All the beautiful rainbows I'm seeing during June inspired me to make this 3-in-1 rainbow welcome wreath. 


What makes it 3-in-1? I made the sentiment removable, so when June rolls around, you can switch out the more general "Welcome!" for this "Happy Pride!" version. 


This "Lucky" version is for March. Affiliate links below. 


3-in-1 Rainbow Welcome Wreath


Materials:


Steps: 


Cut the center out of a paper plate to make a wreath shape. I used a dessert-size plate, but you can use whatever size you want. 

Go through magazines and tear out pages with red, orange, yellow, green, blue, and purple on them. I used the monthly guide sent to us by the city, which is why you see information about recycling/waste and classes. 


Use a pen to draw lines marking roughly equal sixths on the paper plate. If you think of it like a clock, draw a line at 12:00 and 6:00 first, then lines at 2:00, 4:00, 8:00, and 10:00. This will give you an idea of how much space each color should take up. 

Starting with red, cut around any text or pictures until you have a good-sized pile of red pieces. Glue them into one of the six segments. Working clockwise, do the same with orange, yellow, green, blue, and purple. 


If you are going to be hanging your wreath outdoors, seal it with Outdoor Mod Podge. 


Write or print your sentiments onto white cardstock and trim the ends like banners. If the wreath will be exclusively indoors, you can leave cardstock as is. Otherwise, seal them with clear contact paper. Attach a sentiment to the wreath with poster putty. You should be able to remove it easily when it's time to switch sentiments. 

2/7/22

Family Photo Paper Plate Wreath

When Trevor was a baby, I printed pretty much all the photos I took, then picked among them to scrap my favorites. The ones I didn't use went into a box. By the time he was 4 or 5, I started planning my layouts before ordering photos. Now I rarely end up with a printed picture I don't use. 

Last week, I picked a photo out of the box to make my conversation heart photo frame ornament. While I had the box open, I chose another 8 photos from Trevor's first year to make a paper plate wreath. Starting at the top, that's the first time Trevor had solid food (rice cereal) and he gave me such a confused expression. Going clockwise, you see cousin Timothy reading to baby Trevor, Trevor playing in his exersaucer, Trevor in his crib looking at his mobile, Steve parading Trevor around the house on his shoulders, Steve and Trevor hanging out on a blanket in the backyard, Trevor trying to feed himself, and Trevor chewing on the ribbon on a gift. The wreath is now hanging with the Valentine's Day decorations and it makes me smile every time I see it. Affiliate links below. 


Family Photo Paper Plate Wreath


Materials: 


Steps: 


Cut out the center of the paper plate, leaving just the rim. Add a coat of Extreme Glitter.   

Place the heart template on a photo and move it around until you are happy with how the photo will look when cut into a heart. Trace the stencil with the Sharpie, then cut just inside the line. Repeat for the remaining photos.

Glue the cut-out photos to the cardstock, leaving 1/2" between each photo. Carefully cut around the photos so that they have narrow black mat around them.  

Thinking about the wreath like a clock, place photos at 12:00, 3:00, 6:00, and 9:00. For the 3:00 and 6:00 positions, try to have the faces looking inward.  


Place the remaining hearts evenly between the hearts you've already placed. Again, try to position the faces looking in. Glue all of the photos in place. When the glue is completely dry, turn the wreath over and glue the hanger in place. 


If I were doing this with a group, I'd glue the photos and the hanger with hot glue since it dries much faster. Plus, it has a stronger hold. Mine is holding up just fine with the craft glue; we'll see how it holds up over time. I may end up reinforcing it with hot glue.

11/29/21

Paper Plate Advent Wreath

Tis the season of Advent! Yesterday was the first Sunday in Advent and the first day of the new church year. Advent is always a special time as we prepare for Christmas, but this year our family had something extra-special to celebrate - the baptism of our nephew (Trevor's cousin, Ian) and Ian's son, Allen. 

This year, I made a paper plate Advent wreath to mark the season. As you can see, it already has one purple candle for the First Sunday in Advent. For the next three Sundays, we'll add another candle to the wreath (another purple candle, then the pink, then the last purple). While I like Advent chains that count down to Christmas, I prefer the symbolism of adding candles rather than subtracting rings. It's a great visual reminder that Advent is a time to get increasingly prepared to celebrate the birth of Christ. 


Paper Plate Advent Wreath


Materials:

  • paper plate (I used the dessert size)
  • green paint
  • tissue paper (green, red, purple, pink, yellow)
  • white cardstock
  • scissors
  • glue

Steps: 


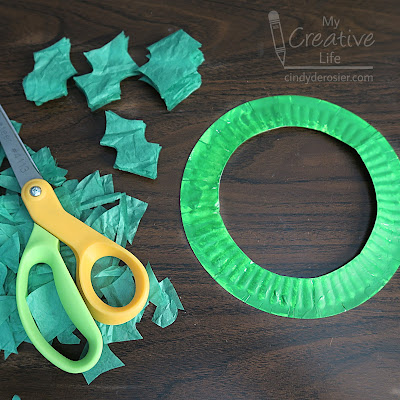
Cut out the center of the paper plate. Paint the remaining part of the paint green. While it is drying, stack green tissue paper and cut out holly leaves. 
 

Add dots of glue on the wreath, then add a flat layer of holly leaves to cover the paint. Fold the rest of the holly leaves in half. 


Add a dot of glue to one end of a holly leaf, then glue it to the wreath. (If you glue in more than one place, you lose the dimensionality of the wreath.) Continue until the wreath is sufficiently fluffy and full.

Roll balls of red tissue paper and glue then in clusters amongst the holly leaves. 

Cut out four rectangles for the candles. Use your finger to smooth a layer of glue onto each, then press purple tissue paper onto three of them and pink onto the fourth. Trim the excess tissue paper. To make the flames, cut out four teardrops, smooth glue on them, and press yellow tissue paper onto them. Trim the excess. Cut four tiny rectangle wicks. Glue each onto the back of a candle to connect it to the flame. 


Each Sunday, take the appropriate candle (purple, purple, pink. purple), and fold the bottom slightly to make a tab. Spread glue on the tab and attach it to the wreath. 


Happy Advent, everyone!


CLICK.BUY. CREATE. Shop Michaels.com today!

9/24/21

Paper Plate Halloween Wreath

 Check out my new Halloween wreath! The base is a paper plate.


---------


Paper Plate Halloween Wreath


Materials:


Steps: 


Cut the center out of a paper plate so that you have a ring. Then cut the Halloween papers into 1.5" x 8" strips. I used 25 strips for my completed wreath. 


Cut a V in the end of each strip, if desired. Glue the strips to the paper plate, letting a bit of the strip hang over the edge. Overlap the next piece slightly. 


Continue until all the strips are glued. Flip the wreath over. Use scissors to trim the excess paper so that the opening of the wreath is even. 


Decorate the wreath with papers and stickers. I cut the HAPPY HALLOWEEN strip from one of the patterned papers, then added the five stickers. 


Because it's made from a paper plate and strips of patterned paper, the finished wreath is very light and easy to hang. Mine is resting on a small Command hook.


I'm really happy with my new Halloween wreath!

1/13/21

Martin Luther King Jr. Day Puzzle Piece Peace Wreath

It's been almost 58 years since Martin Luther King Jr. shared his dream of the day when his children will "live in a nation where they will not be judged by the color of their skin but by their character." Remember this great civil rights leader with a puzzle piece peace wreath. (Say that 5 times fast!) Affiliate links below. 


Puzzle Piece Peace Wreath


Materials:


Steps:


Cut out a wreath shape from chipboard. Mine is about 8" in diameter, but you can make it as large or as small as you want.

Lay out the puzzle pieces on your wreath to determine how many you will need, then paint them in different skin tones. If you are repurposing a thrift store puzzle rather than purchasing puzzle pieces specifically for crafting, you should add a thin coat of gesso to the glossy side of the pieces before painting them. 


Cut a length of ribbon, tie the ends, and loop it around the wreath to make the hanger. 

When the paint has dried, start gluing the puzzle pieces to the wreath. Write "I have a dream..." on a piece of cardstock and glue it to the front of the peace wreath. 

12/21/20

Edible Advent Wreath

As a professional craft blogger, my job is to design creative projects and then write tutorials to teach you how to make them. Ideally, each project should make my readers want to drop everything and immediately start crafting. For that reason, seasonality is huge. If I publish an adorable Halloween costume on November 1 or a great idea for valentines on February 15, chances are very poor that anyone will drop everything to make them. Just like you'll never see a magazine with Thanksgiving recipes in the December issue, I have the most success when I share projects at least a month ahead of when I expect people would want to make them.

And yet, today I'm sharing an edible Advent wreath. Advent started on November 29. Yesterday was the fourth (and final) Sunday of Advent. Advent ends in in just a few days. By all counts, this is a terrible time to be sharing an Advent idea. 


And yet, the reality of my life as a craft blogger is that what I share IS my life. I'm sharing an Advent wreath because our family celebrates Advent. Yesterday was the fourth Sunday of Advent, so all four candles are lit on my edible wreath. In an ideal world, I would have dreamed up this project two months ago then promoted it in early November. But that's not what happened. 

Thankfully, the projects I share here will live on here, on Pinterest, in Google Images, and elsewhere. So even though I'm late to the game this time, I'm hoping this tutorial will inspire someone in 2021 and beyond. And maybe someone in 2020; after all, Advent doesn't end until Christmas begins. 

---------

Edible Advent Wreath


Materials:


Steps:


Pour approximately 2 cups of flake cereal into bowl. Pick out anything that isn't a flake (such as raisins, or in the case of the cereal I used, dried strawberries)

Prepare the green Candy Melts according to the package directions. I used about 15 wafers. Pour the melted candy over the cereal, stirring until it is completely coated. Spoon it onto a piece of parchment paper, forming the shape of a wreath. Let the candy set for 2 minutes, then apply the round red sprinkles to make the berries. Set the wreath aside to set completely. 

Prepare the blue (or purple - your choice) Candy Melts according to the package directions. I used 4 wafers. Pour the melted candy onto a piece of parchment paper, then roll the Pocky in it to coat. I recommend making extras, but remember to keep at least one Pocky the original pink. 

Prepare the yellow Candy Melts according to the package directions. I used 2 wafers. Drop a tiny puddle of melted candy onto a piece of parchment paper, then drag your scribe tool (or a toothpick) through it to make a candle flame. You'll only need four, but I recommend making extras so you can choose the best ones. 


When everything is completely set, use your scribe tool to make holes where the candles will go. Then use a sharp knife to trim your Pocky candles to the desired length. (I trimmed off the uncoated area you see in the photo below.) You can also use the knife to shave off any puddling on the Pocky candles.


Choose your four best flames and peel them off the parchment paper. Remelt the remaining yellow candy. Add a small dollop of candy to the back of each flame, then attach them to the Pocky candles. When the candles are secure, remelt the extra green candy and put a dollop on each hole, then put the candle in place. 


Happy Advent, everyone!

11/23/20

How to Draw an Advent Wreath

I'm the chair of the Education Ministry at our church. My job is to oversee the committee that provides adult and youth Sunday School, Bible studies, youth groups, and other educational opportunities to our members and visitors. Last year, we introduced a special all-ages Advent Fellowship that took place between services on the four Sundays of Advent. We had craft days, sang carols, shared beloved holiday cookies, and celebrated the season together with joy. It was a great success. 

COVID-19 means that this year we can't safely hold in-person Advent worship services, let alone come together for crafts, caroling, and potlucks. We're going to do the next best thing, holding our Advent activities via Zoom. Advent starts next Sunday, November 29 and I'll be leading the congregation in drawing an Advent wreath for that first Sunday. I've made three sample drawings. Each uses a different medium (alcohol markers, crayons, and colored pencils) and they have some other variations as well. Affiliate links below. 

This first drawing is done with my favorite Prismacolor markers. Gorgeous color, great blending, and no streaks. 


I did this drawing with Crayola crayons. I am very brand loyal when it comes to crayons; Crayola crayons are sturdy and provide the smoothest, most vivid color. This was my first time trying out their new Pearl Crayons, introduced in late 2019. I'm a fan!  


I used both Prismacolor colored pencils and Crayola colored pencils for this version of the wreath. The Prismacolors give smoother and richer color than Crayola, but they're also way more expensive. The Crayolas are the best of the student-quality colored pencils. 


Now that I've shown you some coloring options, let's start drawing! Orient a piece of paper vertically and draw four staggered candles just below the center of the page. Do not draw the bottoms of the candles. 

As you can see, I drew my samples with a Sharpie because it's easier to see. You can use a pencil if you want the option to erase. You can also use a ruler if you want straight lines. Imperfect candles don't bother me, but it's up to you.  


Now we're going to add holly. Draw two or three holly leaves at the bottom of each candle, using the same motion you'd make to draw waves in an ocean. Vary the orientation of the holly leaves. Once you've covered the bottom of the candles, continue adding leaves randomly around them to make an oval-shaped wreath. 


When you have filled in the whole wreath with holly, draw little circles in between some of the leaves to make holly berries. Then add a wick and a flame to each candle. 


Now decide what you'd like your text to say and how you want it to look. I used a portion of Mark 1:3 (Prepare ye the way of the Lord), but there are many other verses or phrases that you might prefer. You can also choose to label the four candles or not. Looking at the samples again, you can see three different options for how to use text and how I incorporated the Star of Bethlehem. 


If you're interested in seeing my other Advent crafts for kids, click the link. Happy Advent and happy crafting!

4/8/20

Felt Applique Easter Egg Wreath

When I shared the felt applique bunny last week, I mentioned that it was inspired by the Easter egg wreath I was making. I've finished it and it came out even better than I'd hoped! 


The wreath was part of a kit (affiliate link here and below) that included the felt (I had to cut out all the pieces), the embroidery floss, the sequins, the beads, two needles, and the interfacing that serves as the base of the wreath. The only material I needed that wasn't included in the kit was the Poly-fil. I started out by following the directions closely, but as I got the hang of it, I veered off in my own direction. While my wreath looks similar to the photograph on the front of the kit, you can spot plenty of places where I changed up the colors or patterns on the decorated eggs. 

While there was a bit of a learning curve, overall this was a fairly easy project. I would recommend it to anyone age 9-plus. (If you're quite a distance on the 'plus' side of 9 like I am, I HIGHLY recommend this magnifying lamp for threading the itty-bitty beading needle.) Once I learned the basics, it was very relaxing to sew each egg. 

Now that I've dipped my toe into the world of felt applique, I am dying to start another project! I particularly would like to do other seasonal wreaths so that when I take down the Easter wreath, there's another to go in its place. I'm going to do at least two more kits before I even think about designing my own felt applique project. These are the ones I'm considering doing next: 


I'm also strongly considering this beautiful advent calendar. What do you think I should do next? Any of the designs jump out at you? 

12/11/19

Plaid's Let's Paint Live - Handmade Holiday Ornaments (Cindy's Version)

I had a blast with this month's "Let's Paint Live" with Plaid! This time, the project was Handmade Holiday Ornaments. Check out what I made:


Instructor Jessie Pniewski's ornaments look like this:


Astute readers may notice that my projects look a bit different than Jessie's. Perhaps the biggest difference is that I used cork coasters as my substrate rather than wood rounds. (Affiliate links here and throughout the post). I've never painted on cork and was curious to see how it would work. Once I decided to go off-script and use Jessie's instruction as guidance and not gospel, I made a few other modifications.


The trees are more sparsely decorated and I painted the blue background all the way to the edge. (I also put a base coat of white gesso on that coaster, but it turns out that I didn't need to. I didn't use gesso for the other two coasters and there's no obvious difference in coverage.) The buffalo plaid didn't work all that well on the cork, and I changed the deer into a mouse with a sprig of holly on one ear. The wreath got a lot bushier and gained a bow. 

But the most interesting experiment was with the rub-on. I was really curious to see how it would adhere to cork. There were a few tiny cracks, but they're barely noticeable:


I'm trying to decide how best to seal these so I can use them as coasters. My gut is saying Mod Podge Ultra, but I'm not sure what it will do to the rub-on. Only one way to find out, right?!

Anyway, thanks to Plaid for another super fun Let's Paint Live! The next one is coming up on Thursday, January 11 and I can't wait.